Bento Cakes vs Traditional Cakes: Which One Fits Your Celebration?


Do you love cake but hate the guilt (or waste) that comes with oversized slices? Perhaps you’ve faced the dilemma of ordering a grand traditional cake, only for half of it to go stale in the fridge. Or maybe you’ve wished for a sweet treat that feels special without being excessive. 

If you’ve ever felt overwhelmed by choices or pressured to stick with tradition when something fresh might suit better, this article is your guiding light. We’ll discuss the charm of bento cakes versus traditional cakes, so you can match your dessert to your event with ease. 

Whether you’re planning a birthday, wedding, or just a cosy get-together, your ideal dessert match is but a few insights away! 

Bento Cakes vs Traditional Cakes: What’s the Difference?

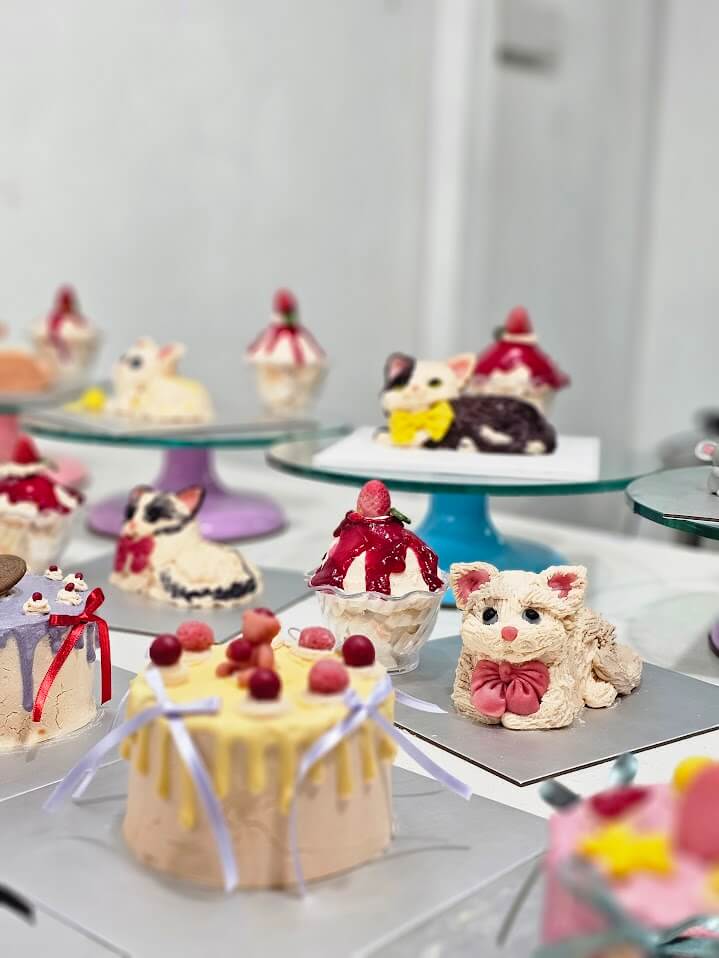
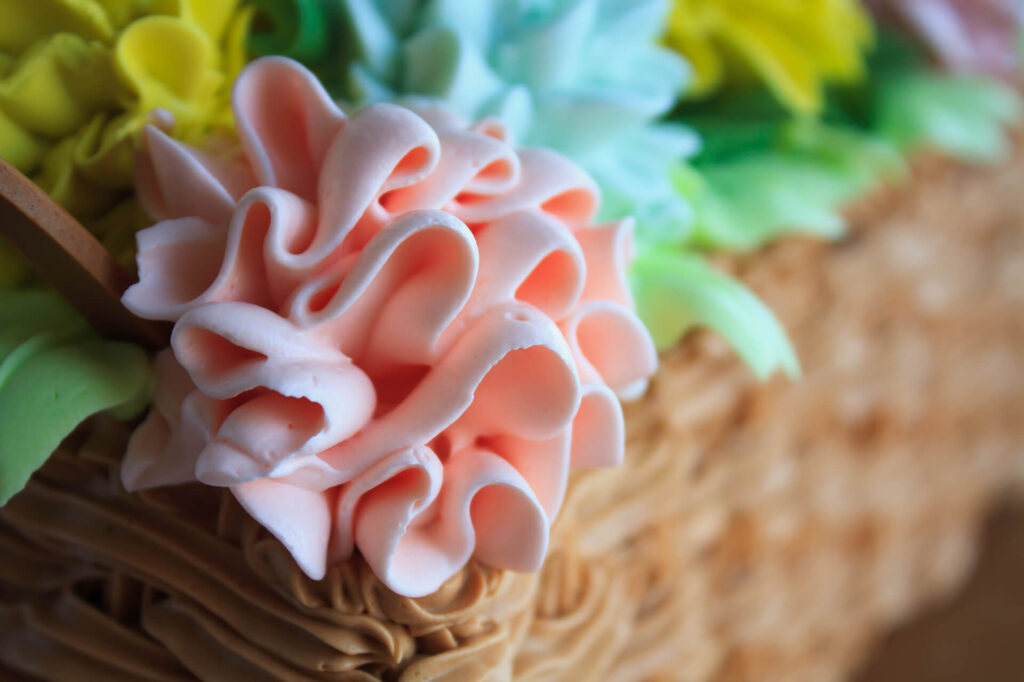
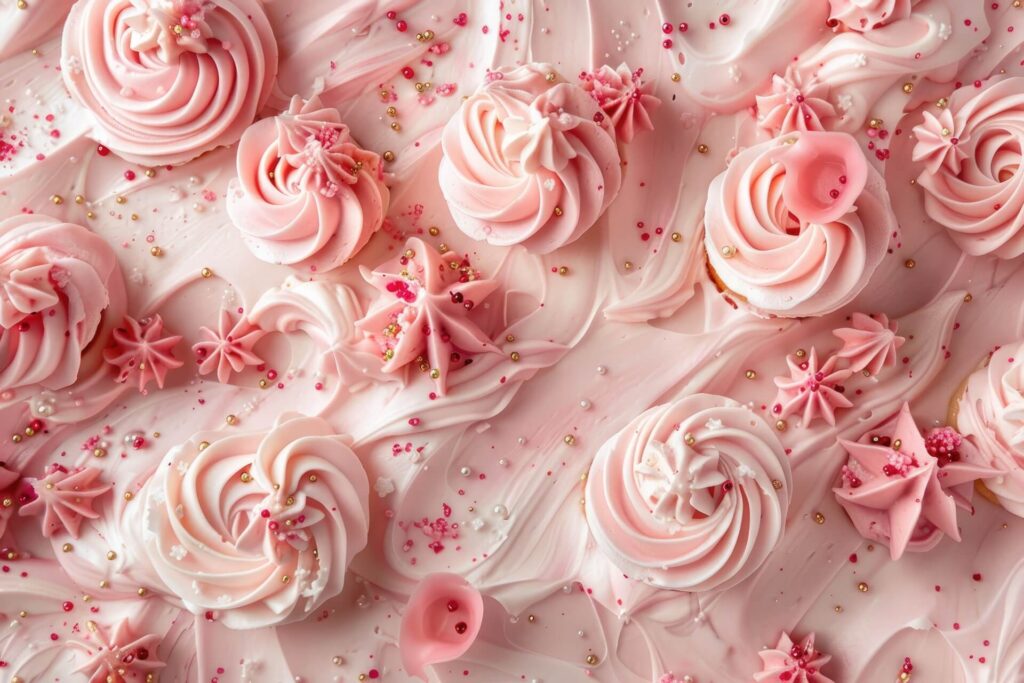
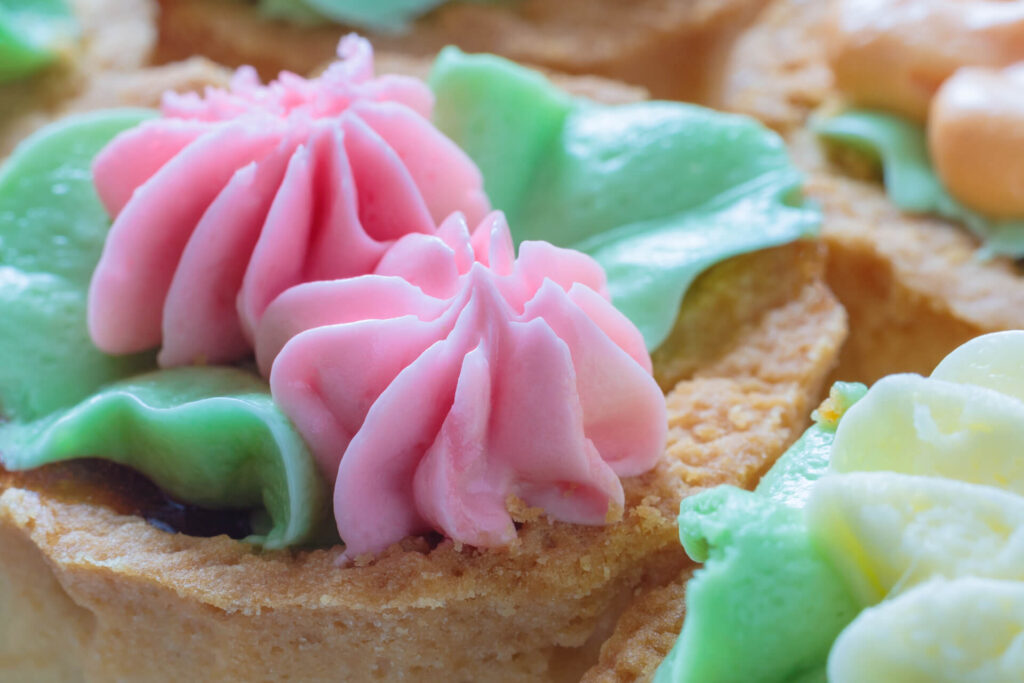
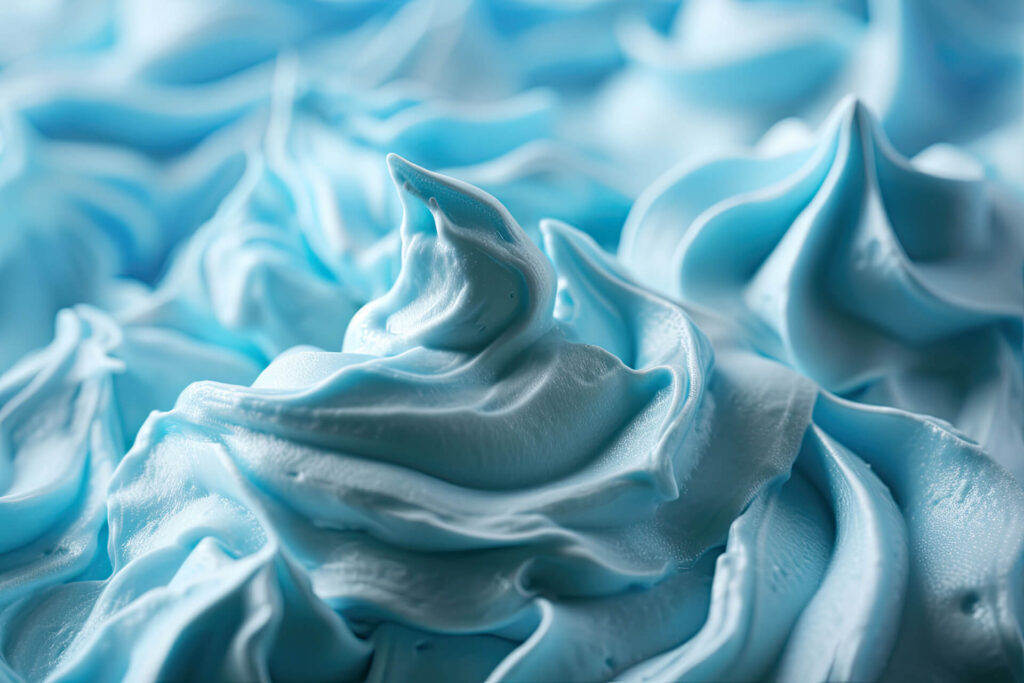
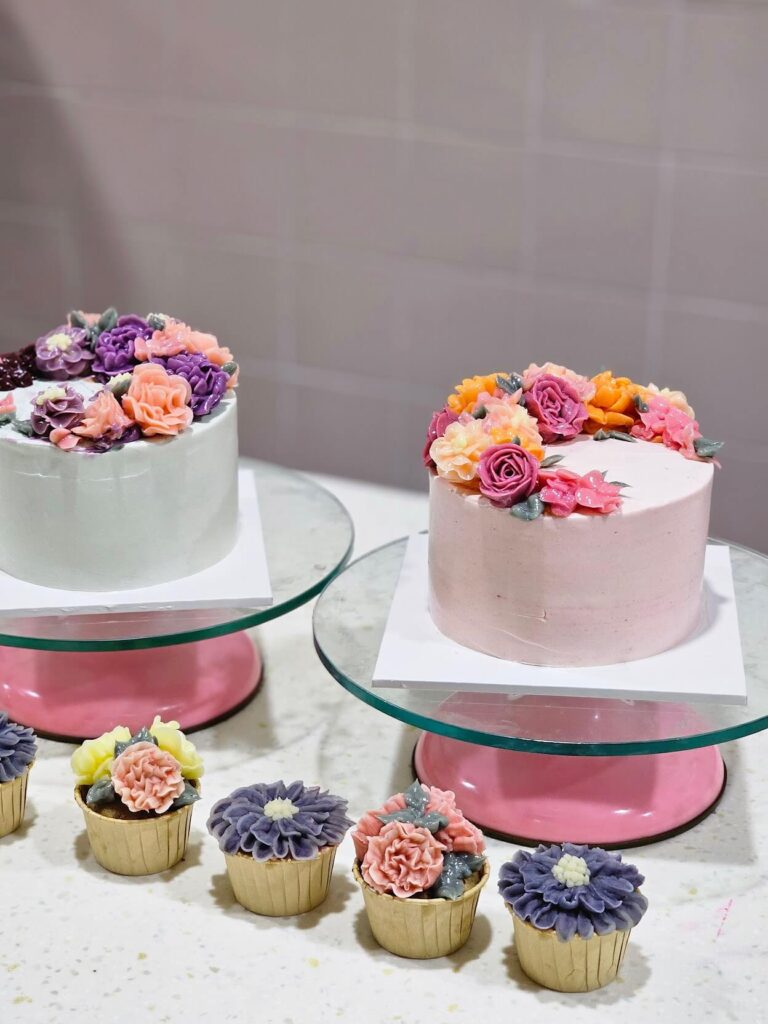
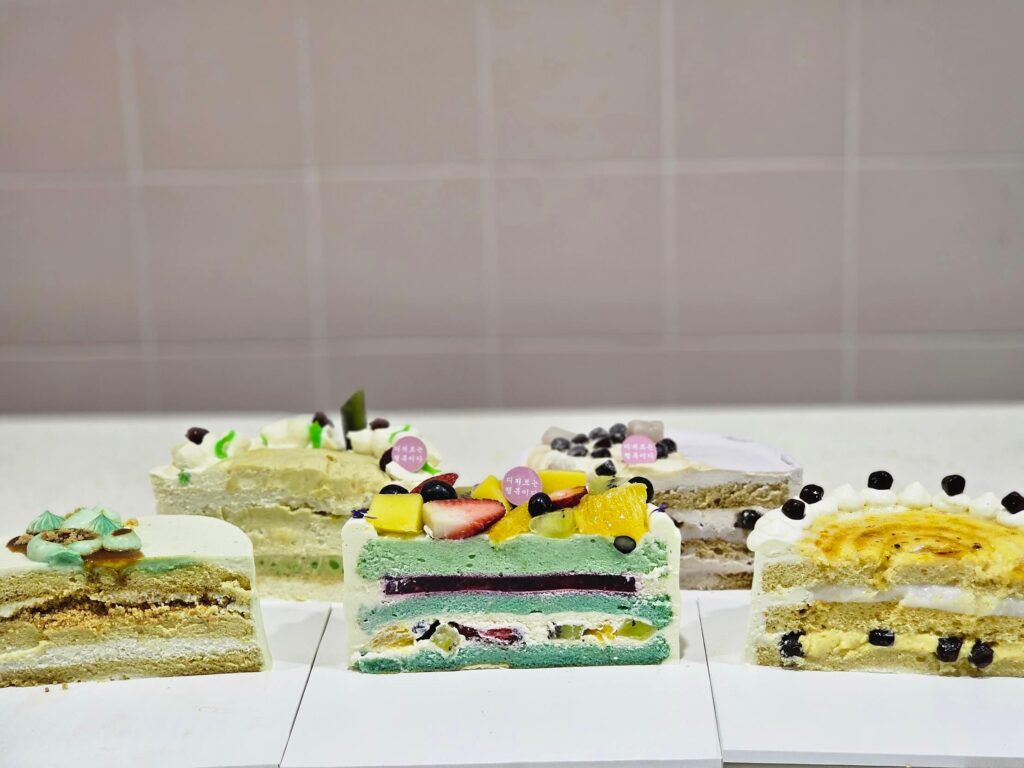
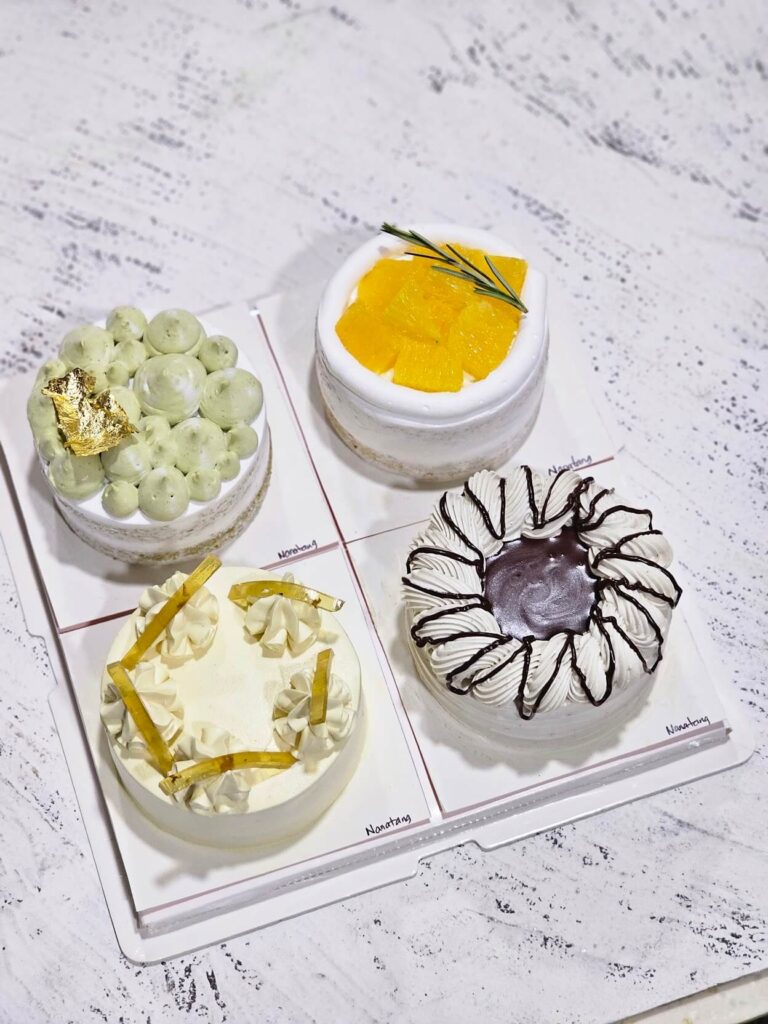
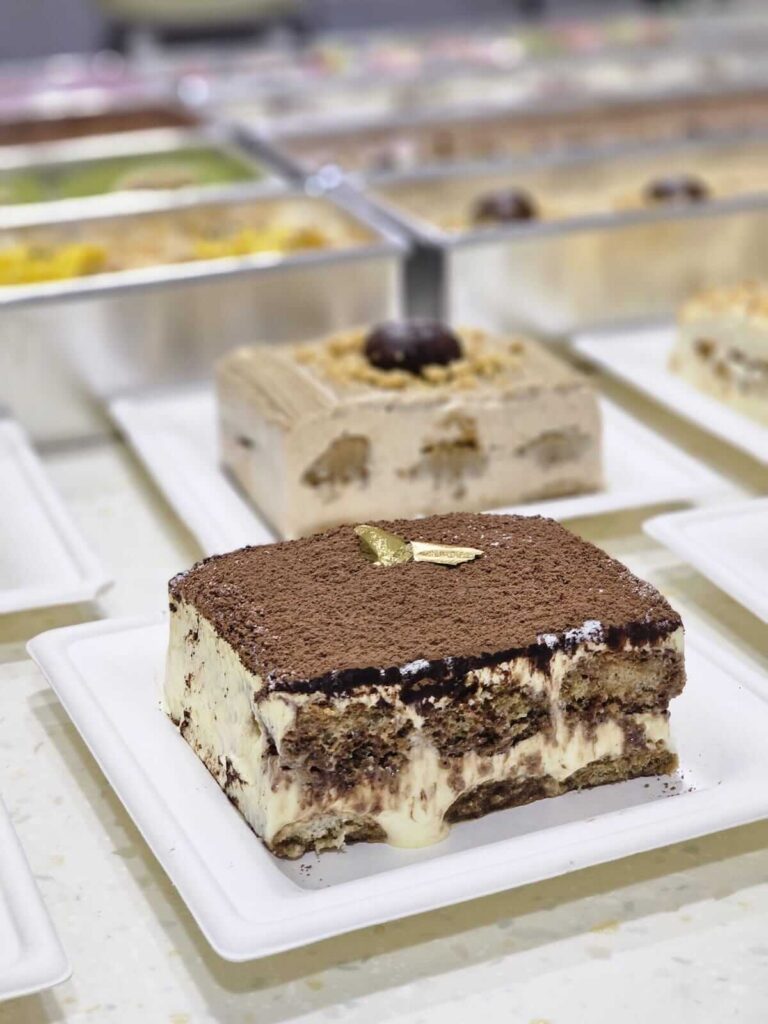
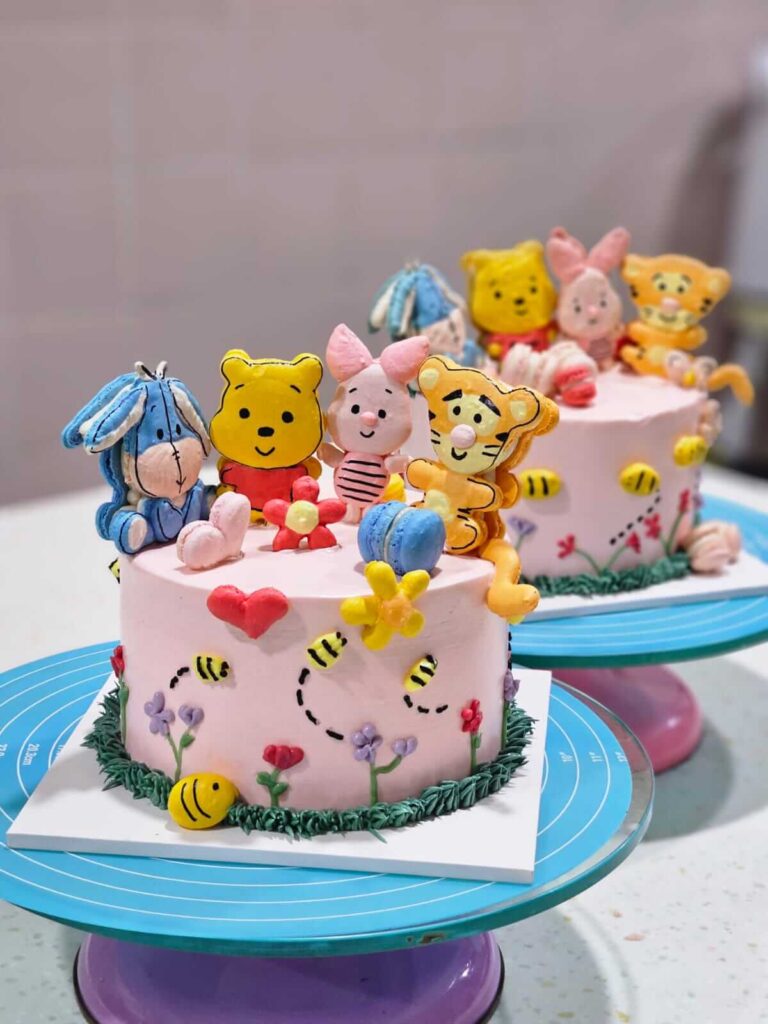
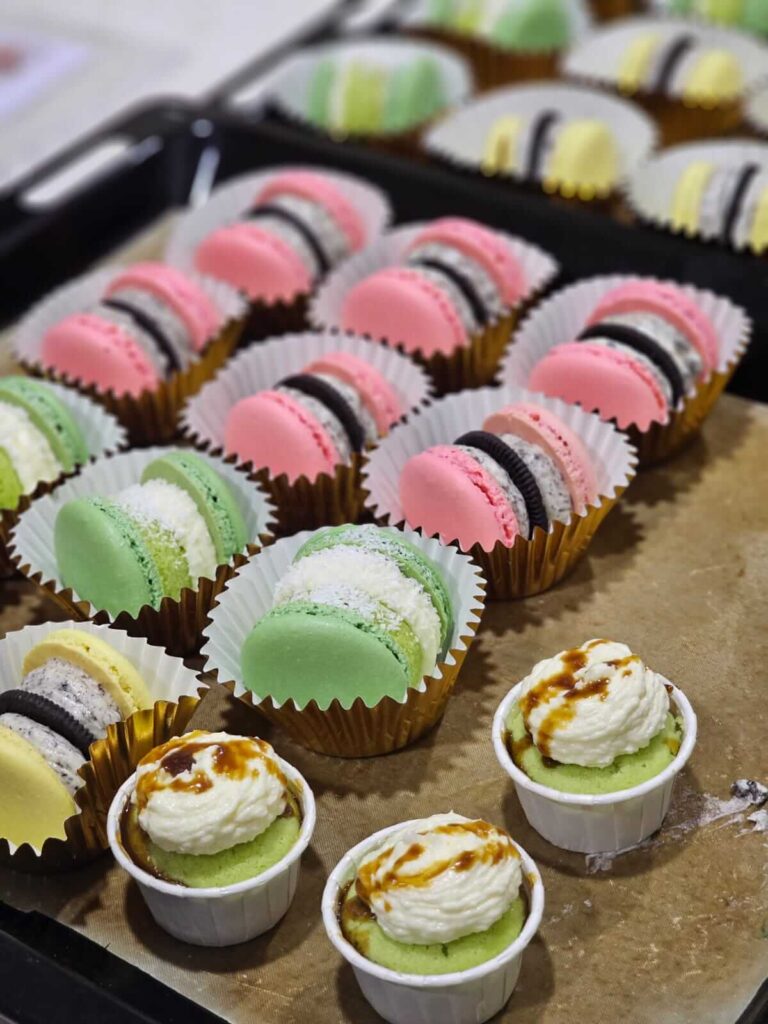
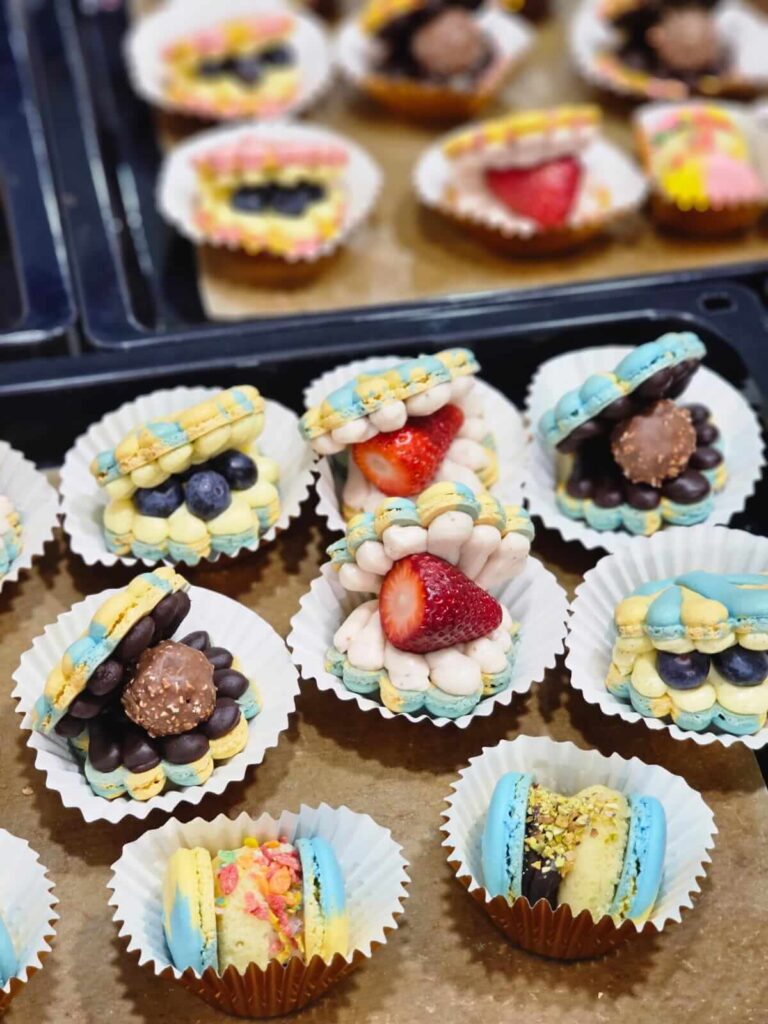
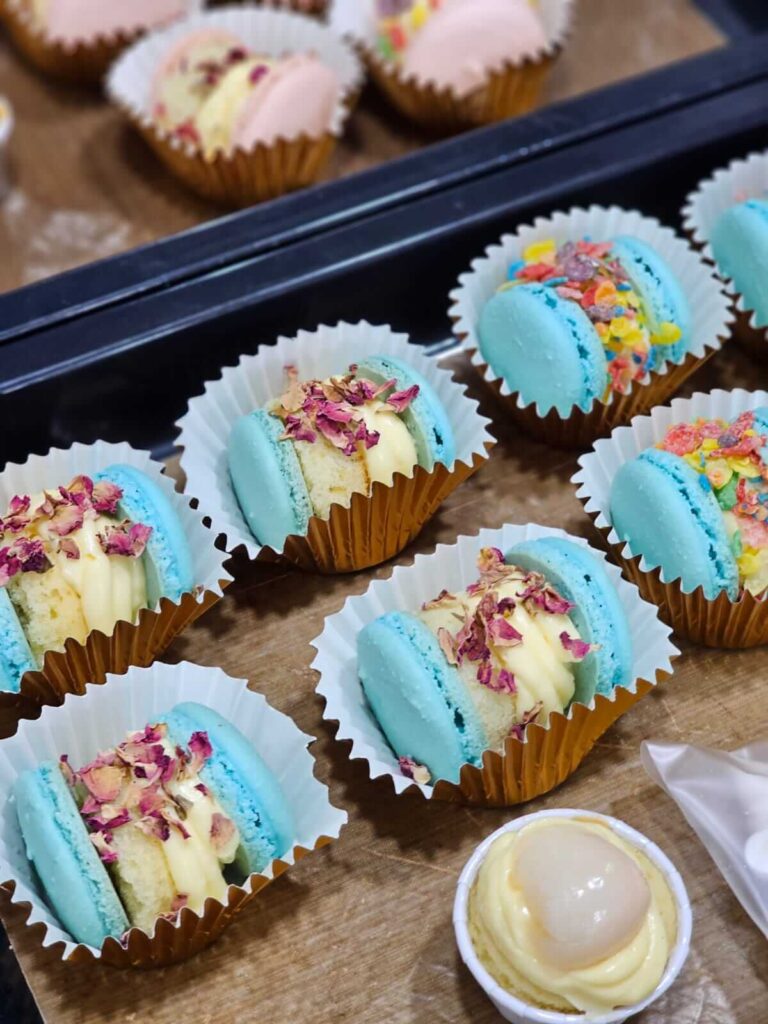
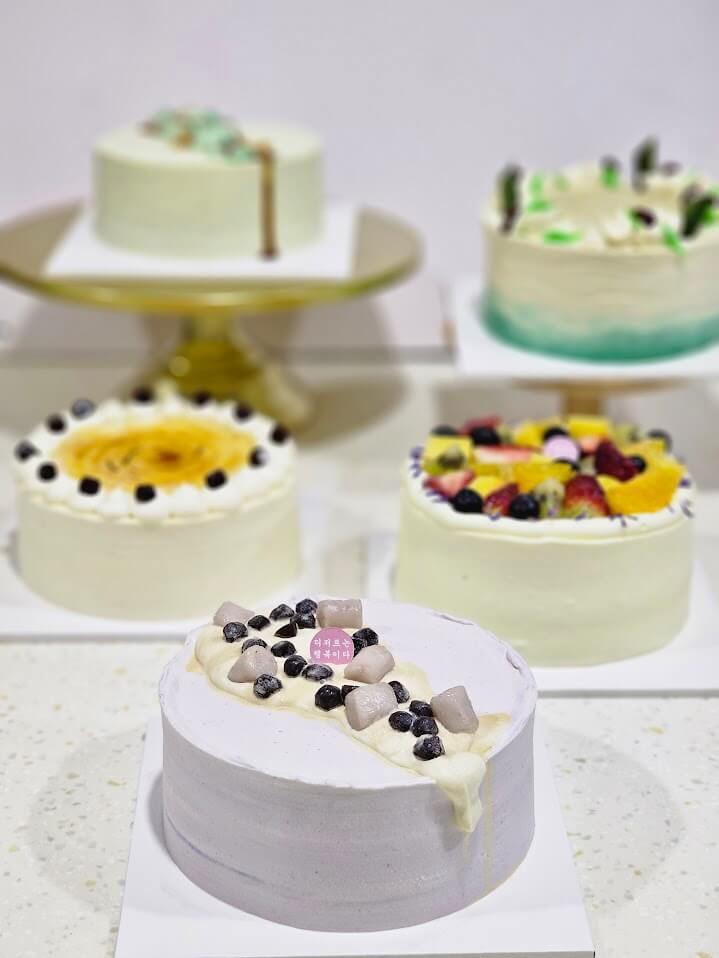
Okay, let’s settle this cake debate once and for all! You know those adorable little cakes that look almost too pretty to eat? Those are bento cakes—think of them as the perfect personal dessert (though enough for two), about the size of your hand (4-6 inches). They’re like the cupcakes’ fancier cousin—each one gets its own cute design, whether it’s dainty flowers, round little bears, or just something wacky. The best part? They’re light as air with the right amount of frosting, so you don’t feel guilty going back for seconds. And here’s an obvious telltale sign: more often than not, bento cakes are stored in bento boxes. 

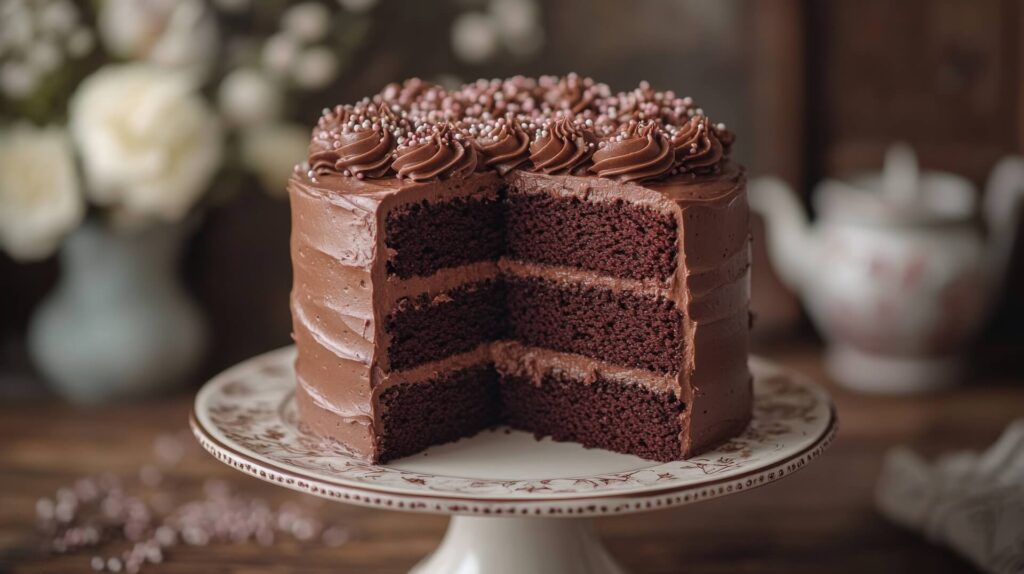
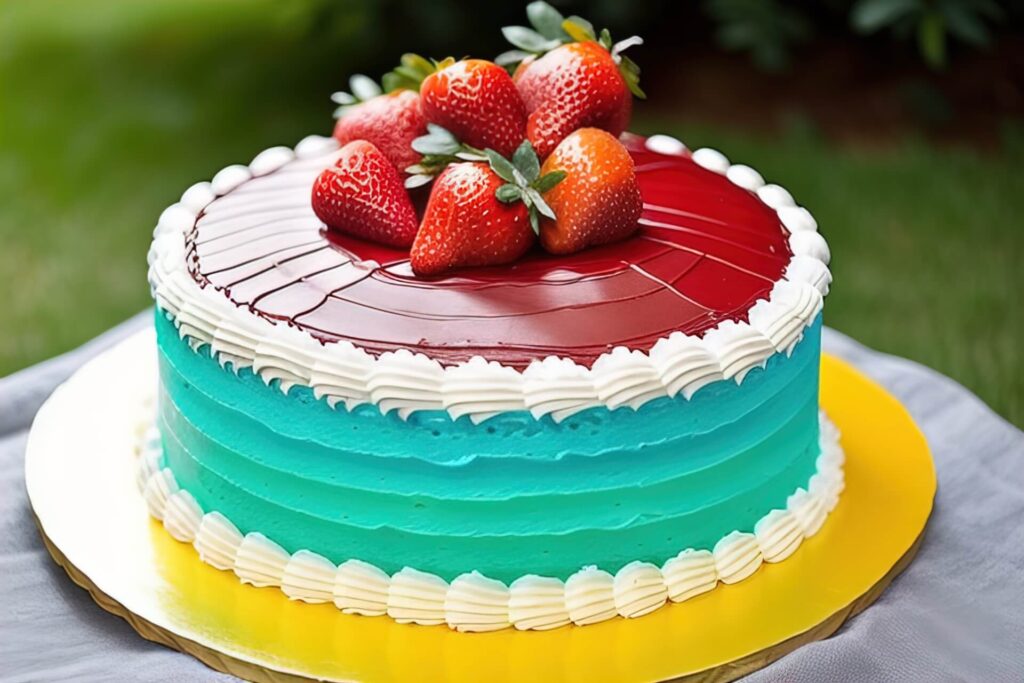
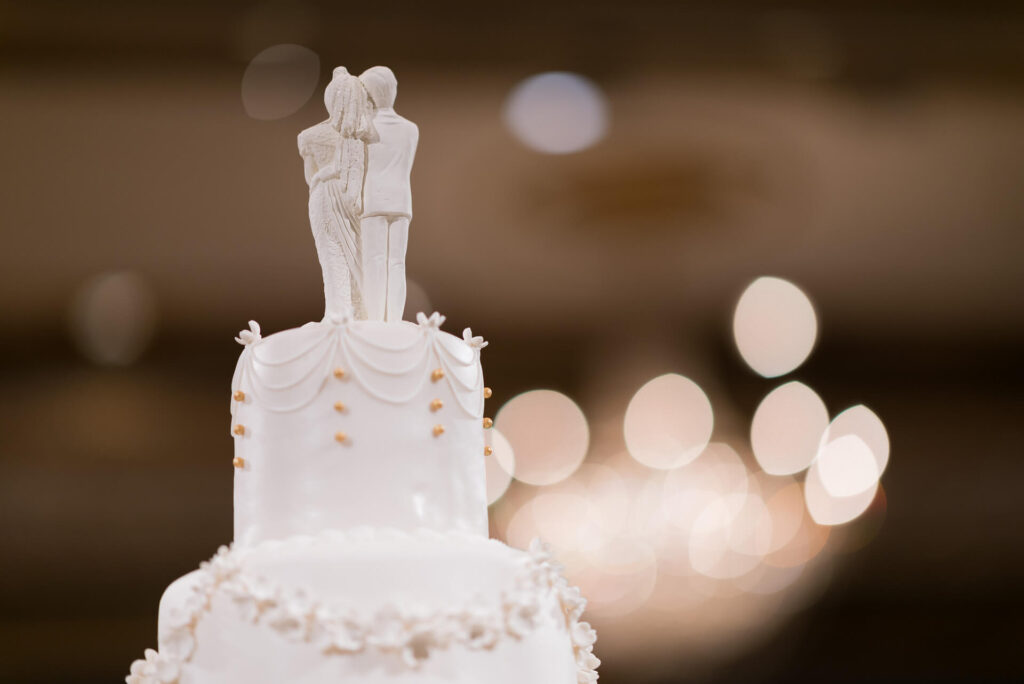
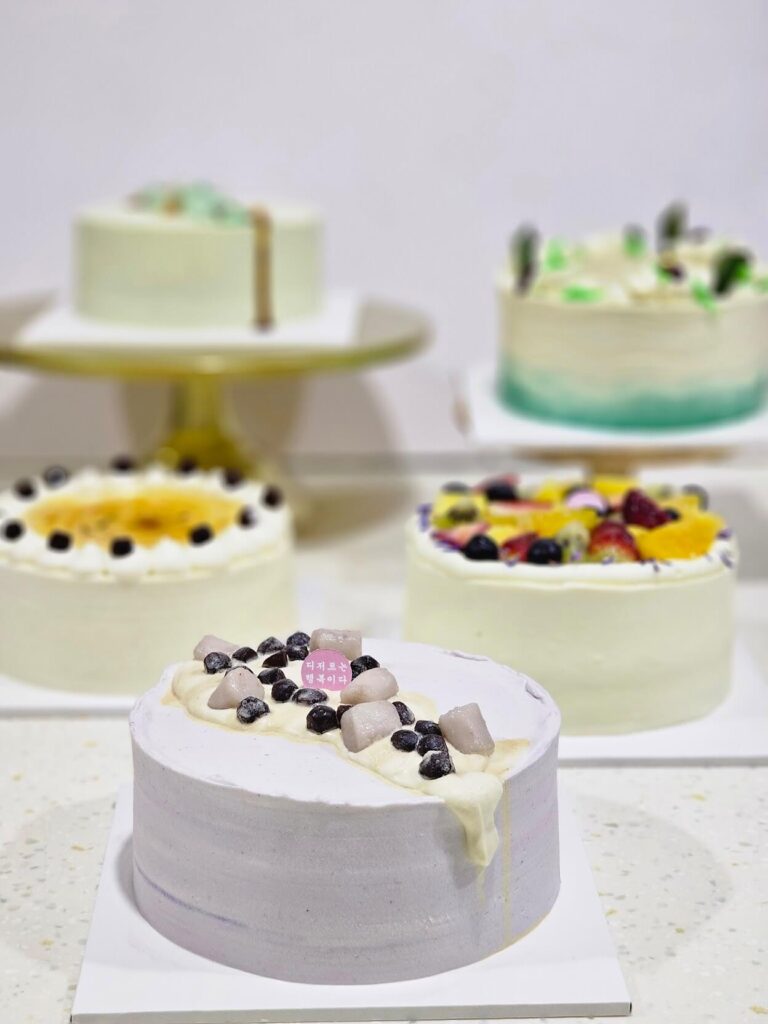
Now, traditional cakes? Those are the showstoppers—the big 8-inch or larger beauties that make everyone gather around when it’s time to cut. They’re pretty much what you picture at weddings when the couple does their fancy first slice, or at milestone birthdays when you need enough cake to feed the whole family. You’ve got everything from simple buttercream frosted numbers to those jaw-dropping tiered masterpieces that look like they belong in a bakery window. Texture-wise, they can be anything from dense fruitcake to cloud-like chiffon—there’s truly a traditional cake for every taste and occasion!

Here’s how we at Nanatang see it: want something personal and Instagram-worthy without leftovers? Bento cakes are your bestie. Hosting a big celebration where the cake needs to be the star of the show? Go traditional. But honestly? We’re secretly team “why not both”—after all, there’s never a bad time for cake.

Which Cake Suits Your Occasion? 

Still not sure whether to go big or small? Here’s a quick breakdown of which events work best for each style.

Bento Cakes Are Ideal For:

Traditional Cakes Are Ideal For: 

Of course, rules are made to be broken! Some couples now opt for a stack of bento cakes instead of a wedding cake, while others order a small traditional cake for an intimate tea party. As cliché as it sounds, it’s all about what feels right for you.

How to Choose the Perfect Cake

If you’re deciding between cake styles, here’s a simple way to think about it. First, consider how many people you’re serving. Bento cakes work well for small groups of up to 5 people—they’re personal and prevent waste. For larger gatherings of 20 or more, a traditional cake ensures there’s enough to go around.

The style of your event matters too. Bento cakes offer modern, photogenic appeal perfect for casual get-togethers. Traditional cakes bring classic elegance that suits more formal celebrations like weddings or anniversaries.

Then comes the budget. Bento cakes can be cost-effective for small groups, while traditional cakes often provide better value when serving many guests. Consider convenience too—bento cakes are ready to serve, while traditional cakes make for a nice ceremonial moment when cutting.

Finally, consider how much personalisation matters to you. Bento cakes allow for delightful mix-and-match flavour options, while traditional cakes make a stunning singular statement. By weighing up these factors, we hope your choice has become crystal clear!

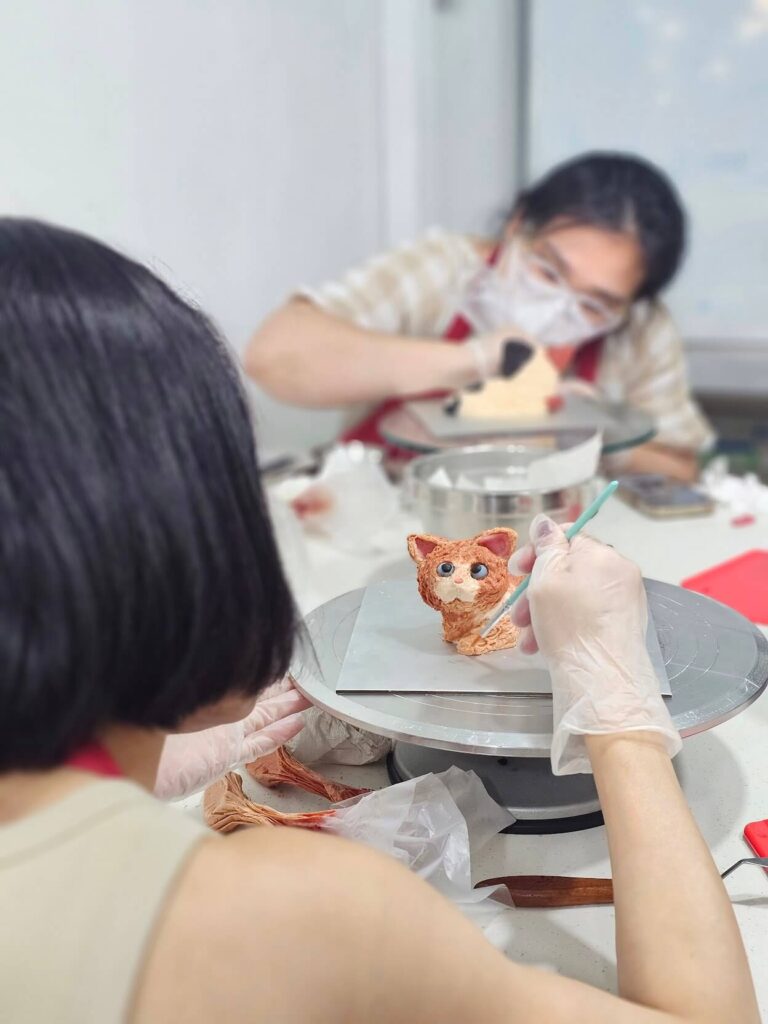
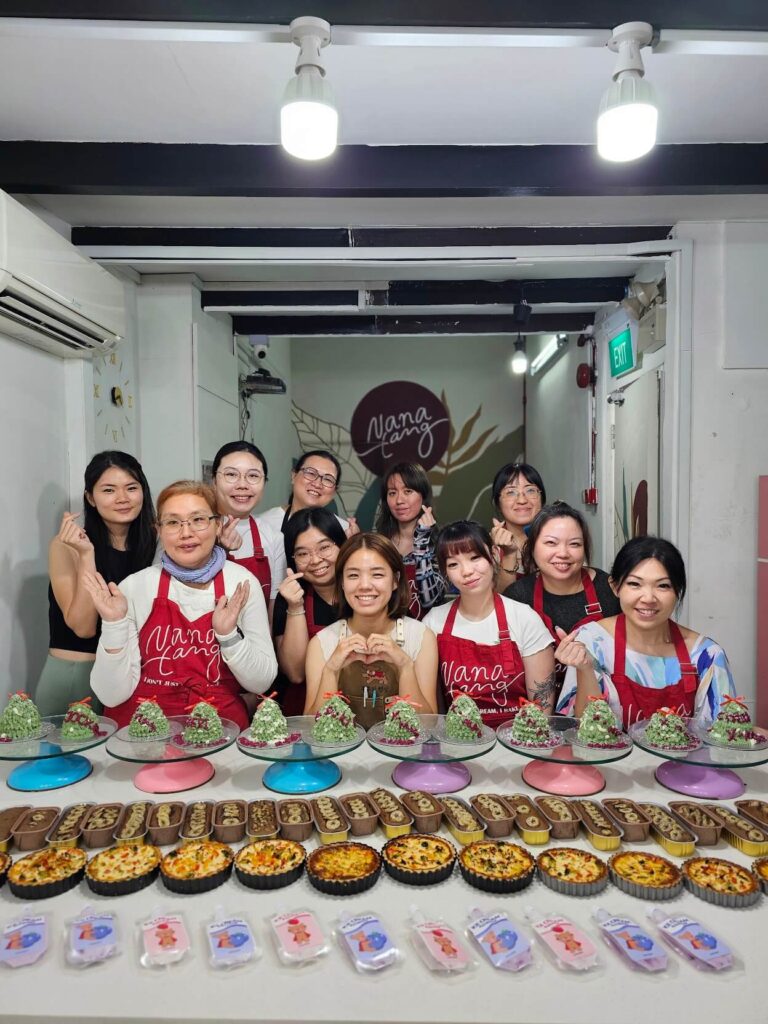
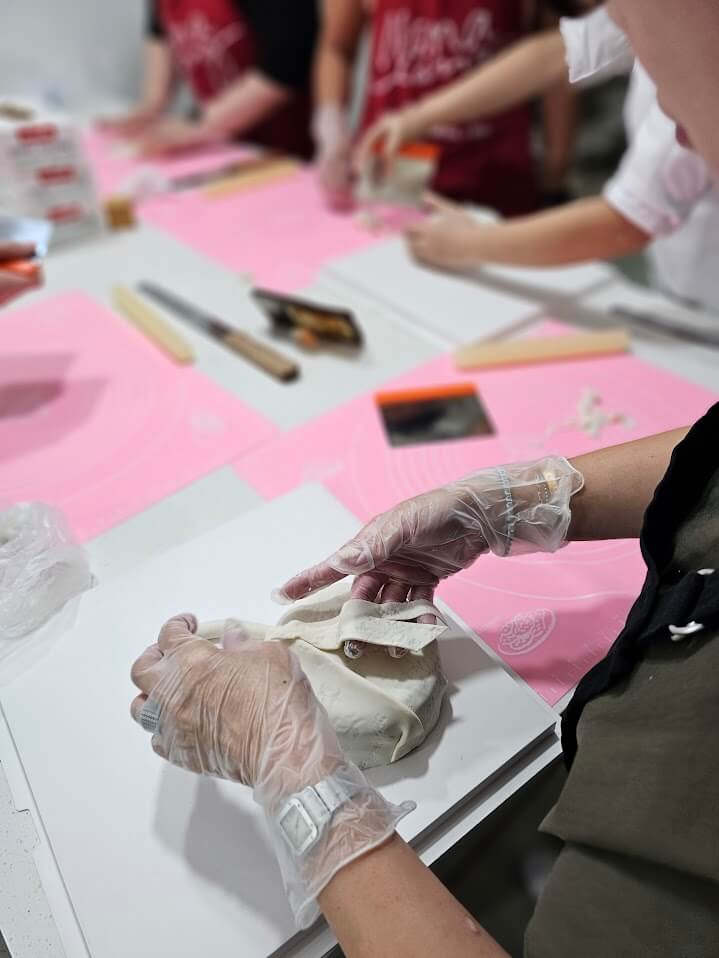
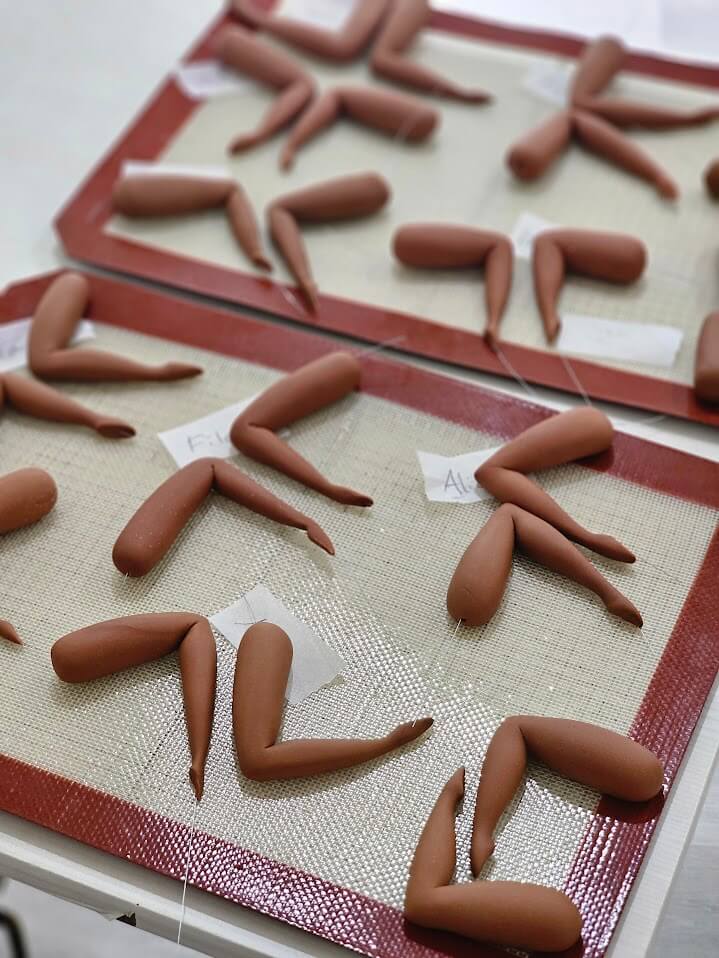
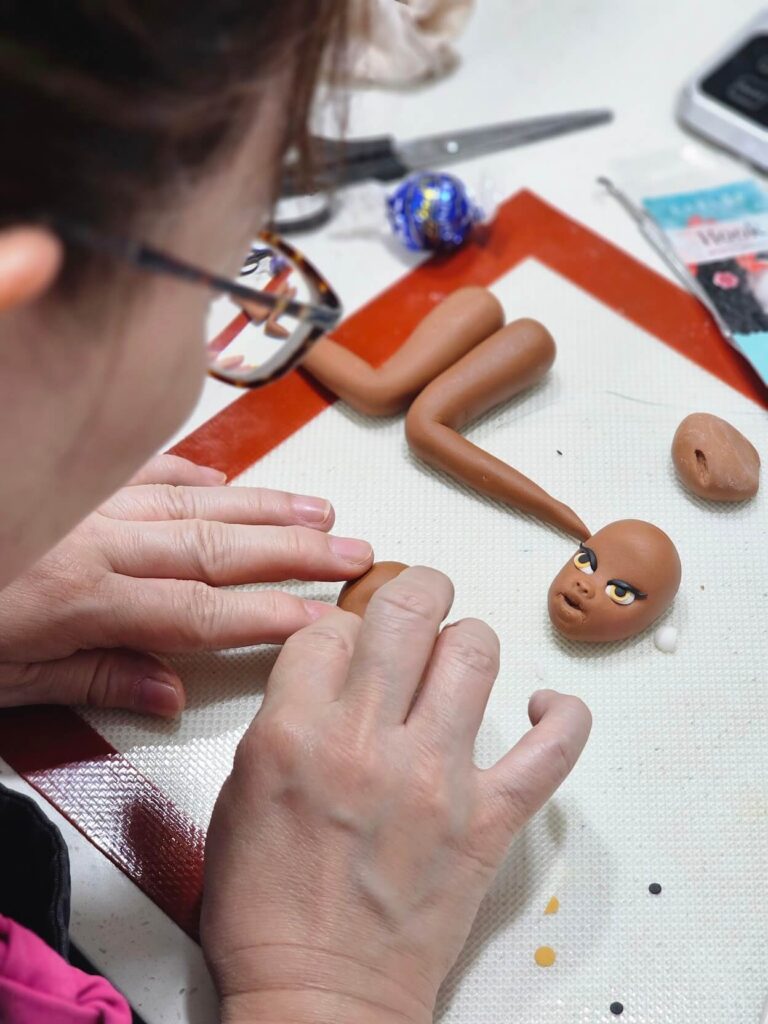
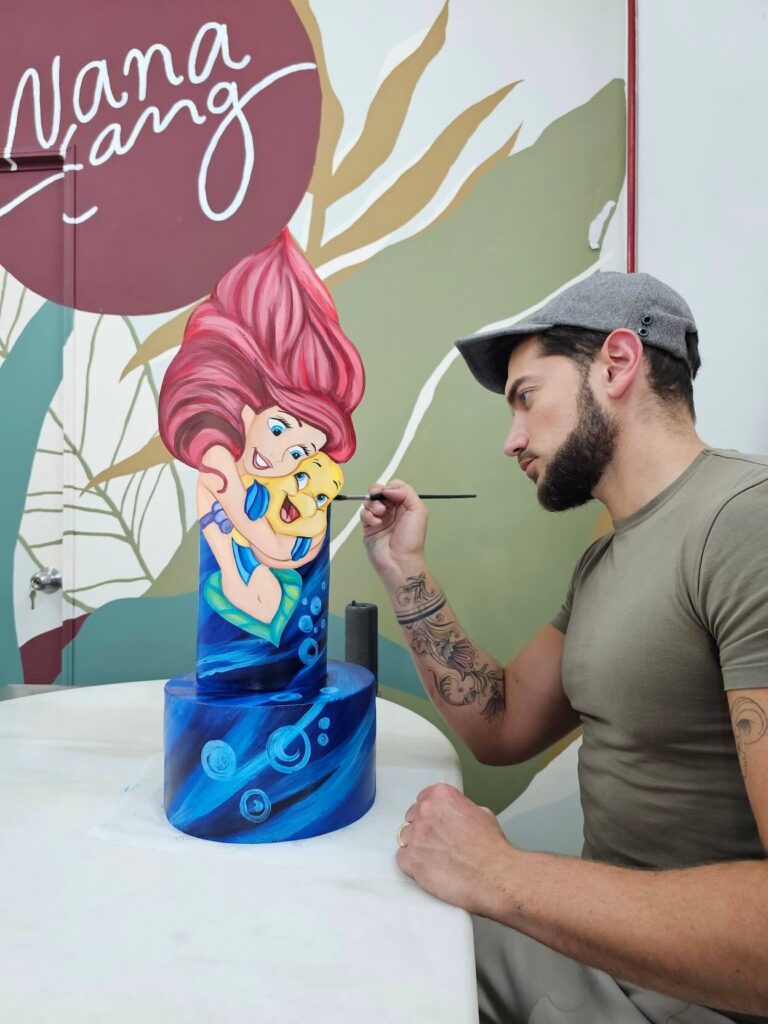
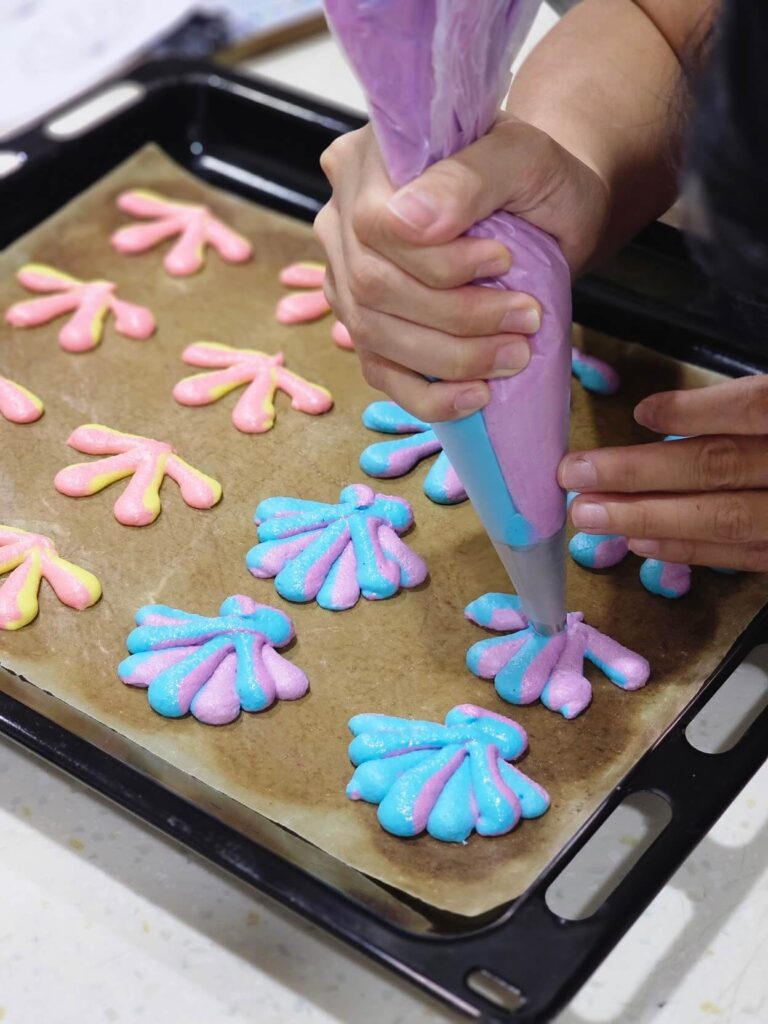
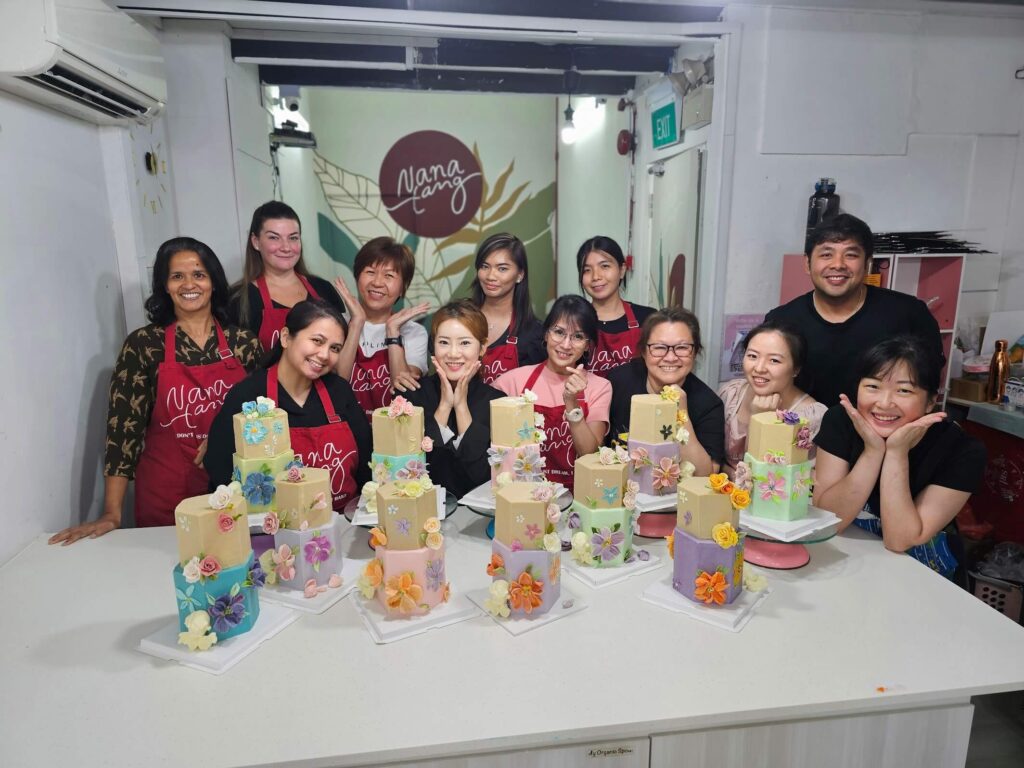
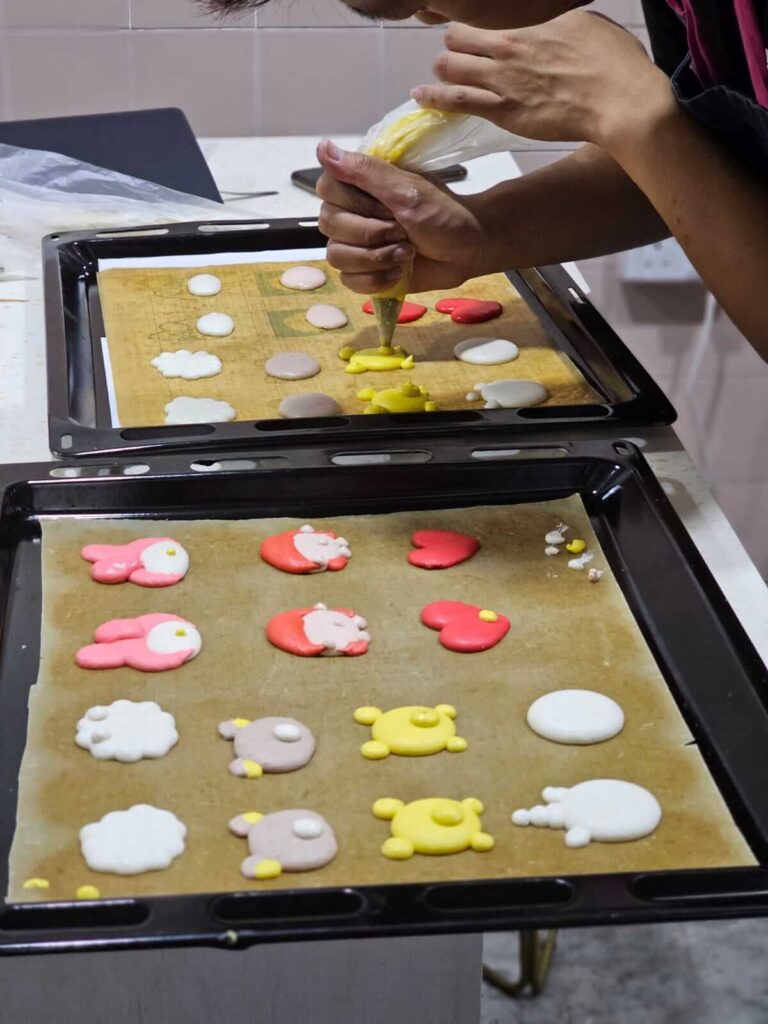
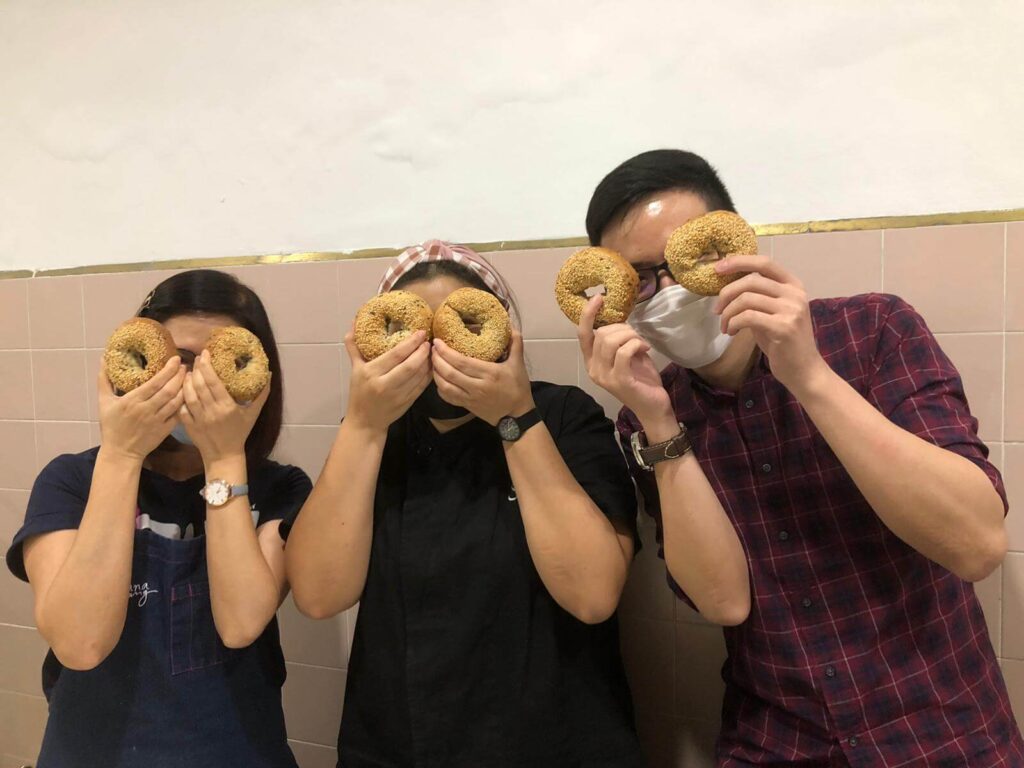
Why Not Bake Your Own? Join Our Cake-Making or Decorating Workshops!

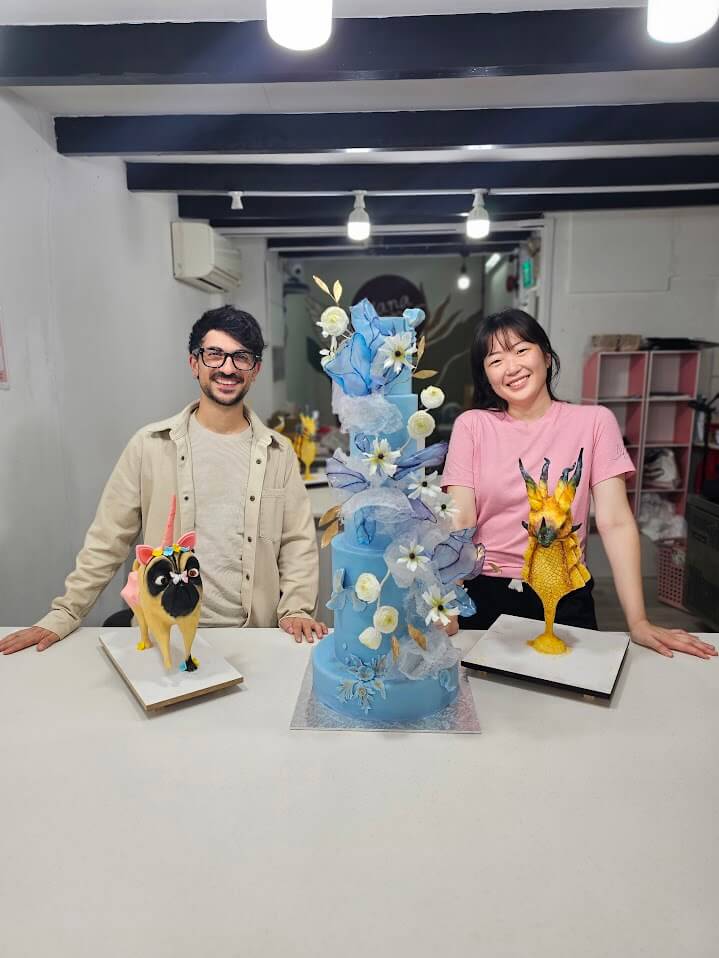
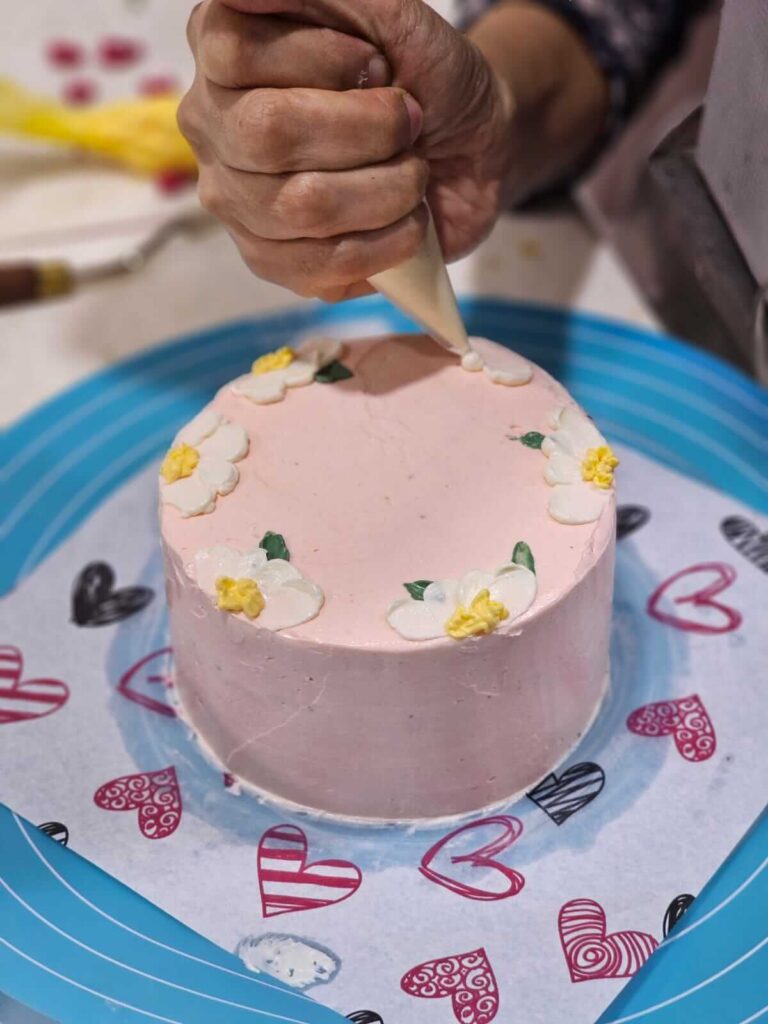
If the idea of creating a bespoke bento cake or baking a homemade traditional sponge appeals to you, why not try making it yourself? At Nanatang, a baking studio, we offer relaxed, hands-on workshops designed to take the stress out of cake creation. Sometimes, we even skip right to decoration. We promise it’s like hanging out in your talented best friend’s kitchen!

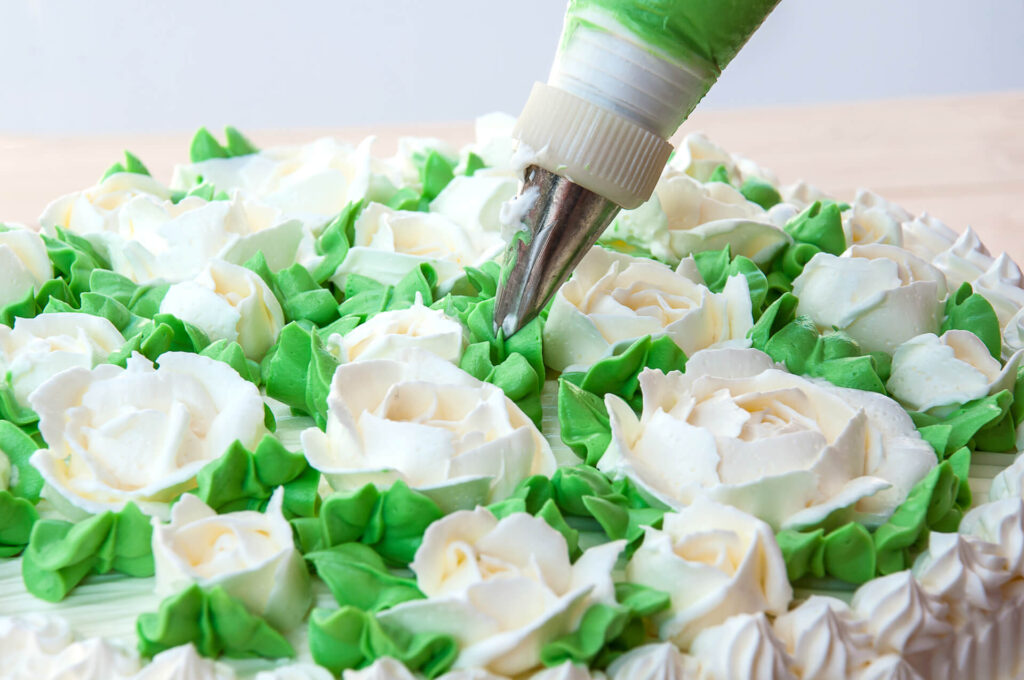
Our expert instructors will guide you through baking the perfect fluffy sponge, suitable for both bento and larger cakes. You’ll learn professional decorating techniques, from achieving smooth buttercream finishes to mastering intricate piping designs. We’ll even share our secrets for creative flavour pairings that are guaranteed to wow your guests!

Whether you’re a complete beginner or a home baker looking to refine your skills, our classes are structured to be fun, rewarding, and completely stress-free. Imagine the pride you’ll feel serving a beautiful cake you made with love at your next celebration—that’s the kind of special touch no shop-bought cake can mimic.

The Choice is Yours, and Both Are Wonderful

At the end of the day, it all boils down to: who’s coming, what’s the occasion, and what makes your heart happy! Tiny and trendy or big and classic—both are delicious ways to celebrate.

And if you’re feeling inspired to take your baking skills to the next level, remember Nanatang’s workshops are always available to help you create cakes as unique as your celebrations. Remember, the very best cakes aren’t just tasty—they’re made with joy, creativity, and a kind of love that not even a bakery can replicate. Qualities that can only come from you!

Join a baking class today and start creating cakes that are as special as your occasions! No experience needed—just bring your enthusiasm, and we’ll handle the rest. 

What to Know Before You Start Baking Paw-some Treats for Your Pet


If you’re chewing over the thought of making homemade treats for your four-legged friend, then kudos—you’re in to join the league of about 27% of pet owners who make their own pet food. Not only can homemade treats be fresher and more nutritious, it also ensures they’re getting natural snacks without the nasties. However, before you make a beeline for the oven and grab your mixing bowl, there are a few important things to keep in mind to make sure the creations for your fur kid are both delicious and safe.

Let’s walk through all you have to know, step by step, so you can bake with confidence and see those happy tail wags (or purrs) in no time.

Homemade Treats – Are They Better?

Shop-bought treats are definitely more convenient. But homemade versions offer several great benefits that make the extra effort worthwhile.

Ingredient Integrity 

The main advantage of homemade pet treats is complete control over ingredients. Commercial products frequently include preservatives, artificial colouring, and low-nutrient fillers such as corn and soy. You eliminate these additives and automatically choose higher quality, nutritionally beneficial ingredients selected based on your pet’s health requirements by preparing treats at home.

Dietary Restrictions

Another great thing about homemade treats? You can tailor them to your pet’s unique needs. If your pup has a grain allergy or can’t handle chicken, no problem—just swap in ingredients that work for them. For pets with sensitive tummies, gentle options like pumpkin or sweet potato can be a soothing choice. Even the pickiest eaters usually can’t resist the smell of treats fresh from the oven.

Tailored Treat Sizes

Another advantage is portion control. Many store-bought treats are high in calories, which can lead to weight gain if given too often. When you make treats yourself, you can decide exactly how big they should be—perfect for training rewards or smaller breeds that only need a tiny nibble.

A Reward for a Reward

Finally, baking for your pet is simply more rewarding. Pet owners naturally love seeing their pets’ excitement when they realise there’s something made just for them. Plus, it’s a fun way to get creative in the kitchen while doing something meaningful.

Step 1: Know Which Ingredients Are Safe

Just because an ingredient is safe for humans doesn’t mean it’s suitable for pets. Many common kitchen items can harm animals, so it’s vital to recognise what to avoid.

Safe ingredients include peanut butter, provided it contains no xylitol, an artificial sweetener that’s deadly to dogs. Plain pumpkin purée (never the spiced variety) works well, as it’s gentle on digestion and rich in fibre. You can use oats and wholemeal flour in moderation, while carrots, blueberries, and apples (with seeds removed) make nutritious additions. Other safe options are plain yoghurt, cooked eggs, and unseasoned lean meats like chicken or turkey.

On the other hand, there are several foods you must never include. Chocolate, coffee, and anything containing caffeine are well-known hazards. Grapes and raisins can cause kidney failure in dogs, while onions and garlic can lead to anaemia. Avocado, though not always toxic, can be problematic for some pets, and raw yeast dough is a definite no, as it can expand in their stomachs. When in doubt, always verify an ingredient’s safety—it’s far wiser to err on the side of caution than endanger your best friend.

Step 2: Select the Right Recipe for Your Pet’s Needs

Every pet is different, so their treats should be too. First, consider any allergies or sensitivities your dog might have. If grains are problematic, you can easily substitute them with alternatives like coconut or chickpea flour. The texture matters just as much—senior pets or those with dental issues typically find softer treats easier to chow down, while energetic puppies often enjoy something with more crunch.

For training purposes, opt for small, low-calorie pieces that let you reward frequently without overfeeding. And if your pet follows a special diet, it’s always best to consult your vet before introducing new ingredients.

If you’re looking for an easy starter recipe, try peanut butter and pumpkin dog biscuits. You’ll need two cups of whole wheat flour, half a cup of pumpkin puree, a quarter cup of xylitol-free peanut butter, and one egg. Mix everything together, adding a little water if the dough is too stiff, then roll it out, cut into fun shapes, and bake until golden. We promise that your dog will absolutely adore them.

Step 3: Keep Portions and Nutrition in Mind

Even healthy treats should be given in moderation. Too many extras can lead to weight gain or an unbalanced diet. A good rule of thumb is that treats should make up no more than 10% of your pet’s daily calorie intake. If you’re unsure, check with your vet to determine the right portion size for your pet’s breed, age and activity level.

For pets watching the scale, lower-calorie alternatives like dehydrated sweet potato or frozen banana slices work well. To enhance nutritional value, consider adding pet-safe supplements; for example, flaxseed provides beneficial omega-3s, while a small amount of turmeric may offer anti-inflammatory properties. Again, just make sure they’re safe for pets first.

Step 4: Store Your Treats Properly

While homemade treats avoid the preservatives found in commercial products, this also means they don’t last as long. For best results, store them in an airtight container in the fridge where they’ll keep for about a week, or freeze them for longer-term storage. When making large batches, freezing portions separately means you’ll always have some on hand.

Crunchy biscuits can be kept in a cool, dry place for 2-3 days, but do check regularly for any mould. For frozen treats like yoghurt and berry bites, they make a perfect cooling snack, letting your pet enjoy licking at it slowly.

Step 5: Have Fun and Get Creative

Making treats for your pet can be a simple and rewarding process. If you’d like, you can use shaped cookie cutters—bone-shaped for dogs or fish-shaped for cats—to make them more appealing. A light drizzle of yoghurt or blended fruit can serve as a safe decoration if you wish to add something more.

If your pet turns their snout up at one recipe, try another—just like humans, they have their individual preferences. The more you bake, the better you’ll understand what your furry friend loves most. It’s like getting to know them all over again.

Need Inspiration? Treat Ideas for Your Pet

Now that you’re all set to bake, let’s talk about some drool-worthy recipes your dog will go bonkers for. Most of these use basic ingredients you probably already have in your kitchen.

Cheesy Bone Breadsticks

Knead whole wheat flour, shredded cheddar, and a splash of low-sodium broth into a dough. Roll into thin breadstick shapes (bone-shaped if you’re extra), brush with egg wash for shine, and bake until golden. 

Savoury Cheese and Apple Cookies

If your dog is more of a savoury snacker, try mixing shredded cheddar with grated apple and whole wheat flour. The apple keeps them moist, while the cheese adds that irresistible aroma. 

Peanut Butter Pupcakes (With Yoghurt Frosting)

Move over, cupcakes—pupcakes are here. Whip up a simple batter using peanut butter, mashed banana, and whole wheat flour. Bake in a muffin tin, then top with a dollop of plain, low or non-fat yoghurt “frosting”. For extra flair, sprinkle with crushed dog biscuits or a blueberry on top. 

Final Thoughts

Baking homemade treats is one of the sweetest ways to show your pet some love—each bite is packed with care, quality ingredients, and that special magic only homemade goodies can bring. If you want to take your pet treat game to the next level, register for a class at Nanatang. Whether you’re a beginner or a seasoned baker, our hands-on classes will give you the skills (and secret tips) to create paws-itively delicious treats for your fluffy taste tester. 

Visit our website to browse our courses and sign up. Until then, happy baking, and may your kitchen be forever filled with the gentle patter of paws when they know something tasty’s coming.

Fear of Fondant? A Guide to Working with Fondant for Beginners


So, you want to make a stunning fondant-covered cake but the thought of working with it feels intimidating? It can certainly feel that way at first! Many bakers break into a cold sweat at the mention of fondant—it can be sticky, fragile, or just a lot to handle. But guess what? With the right tips and a little patience, fondant can actually be fun. Take it from us at Nanatang, where we’ve gone from fumbling with our first lumpy fondant attempts to creating picture-perfect cakes that make people do a double take 😉

That said, there’s no one better than us to help you take that leap of faith. This guide will walk you through everything you need to know, from choosing the right fondant to smoothing out those pesky wrinkles. When you’re ready, we’ll also be here with a spot at our fondant workshop for you. Now, let’s turn that fear into love!

Understanding Fondant

Fondant is a smooth, pliable icing used to cover cakes or create decorative elements. The most common type is the rolled variety, which has a dough-like texture and is perfect for creating sleek, polished cakes. There’s also poured fondant, which is a liquid version used for glazing pastries—but that’s a topic for another day because most beginners kick off with rolled fondant first.

When it comes to choosing fondant, you have two main options: store-bought or homemade. Store-bought fondant is ready-made fondant, meaning it’s obviously convenient and confidently consistent in texture. Homemade fondant, such as marshmallow fondant (marshmallows + icing sugar) can be more affordable and customisable, but requires a bit of practice to nail down. Generally, we recommend grabbing pre-made fondant to eliminate extra variables while you learn the basics!

Essential Tools You’ll Need

You don’t need a ton of fancy equipment to work with fondant, but having a few key tools will make the process much smoother. A non-stick rolling pin is non-negotiable for evenly rolling out your fondant. If you don’t have a fondant-specific roller, a regular rolling pin lightly dusted with cornstarch or powdered sugar will work just as well.

A fondant smoother is a game-changer, as it helps squash air bubbles for a flawless, professional finish. You’ll also want a sharp knife or pizza cutter for trimming excess fondant and a small brush for applying water or edible glue when attaching decorations. Some optional but helpful extras include fondant mats for rolling and shaping tools if you plan to make intricate designs.

Preparing Your Cake for Fondant

Before you even touch the fondant, your cake needs to be properly prepped. Start by ensuring that it’s chilled, as this makes it firmer and easier to manipulate. Then, apply a thin layer of buttercream or ganache as a “crumb coat” to seal in any loose crumbs. This also helps the fondant adhere better to the cake.

Once your crumb coat is set (after approximately 15 to 30 minutes in the fridge), check for any bumps or imperfections. Consider using a bench scraper or spatula to smooth out any uneven spots, because fondant is merciless and will show every little flaw underneath. If you’re working with a layered cake, make sure it’s level and sturdy first—a wobbly cake will make fondant application much harder than it has to be!

Kneading and Rolling Out Fondant

Fondant can be stiff straight out of the package, so kneading lays the foundation for its pliability. Start by working a small piece in your hands until it softens and becomes stretchy. If it feels too dry, don’t panic—a tiny bit of vegetable shortening can help restore moisture. Avoid overkneading, however, as this can make the fondant excessively soft and sticky. 

When rolling, aim for an even thickness. As a rule of thumb that’s about a quarter inch, which is the ideal amount for covering cakes. Dust your work surface with cornstarch or powdered sugar to prevent sticking, but as usual, avoid overdoing it because too much can dry out the fondant. Start from the centre and roll outwards. Turn the fondant occasionally to maintain an even shape. Don’t forget to lift and reposition it as needed to prevent sticking.

Finally, Applying Fondant to Your Cake

This step feels like a long time coming, but the moment of truth has ultimately arrived! Carefully drape your rolled fondant over the cake, starting from one side and gently smoothing it down. Use your hands to press out any air bubbles, working from the top down to the sides. And, if you notice wrinkles, gently lift and adjust the fondant—never stretch or pull it as this is precisely what causes tearing.

Once the fondant is in place, use a smoother to press out any remaining bumps and create a clean finish. Trim the excess at the base with a sharp knife or pizza cutter. If you spot any small cracks or imperfections, a lick of water can help mend or fade it away.

Decorating and Storing Your Fondant Cake

Now, for the fun part—decorating! Fondant allows bakers to unleash their creativity, from simple cut-out shapes to intricate sculpted designs. Use edible glue or a dab of water to attach decorations. If you’re adding colours, gel-based food colouring works best. In our opinion, it’s wise to avoid liquid, as it can alter the fondant’s final texture. 

Once decorated, store your cake in a cool, dry place. This is because fondant isn’t so fond of humidity; in muggy conditions, you’re risking bleeding colours and streaking down the sides of your cake. That said, if refrigerating, let it come to room temperature before serving to prevent condensation. And last but not least, don’t stress over perfection—some mishaps are normal, and what matters most is that you had fun and learnt something new!

Embrace the Learning Process at Nanatang

Fondant might seem scary at first, but like any basic skill, it gets easier with practice. Start with simple projects, like covering a small cake or making basic shapes, before moving on to more elaborate designs. Remember that even the most beautiful fondant cakes started with a beginner’s shaky hands! 

Still hesitant to push past the fear? At Nanatang, we live for those precious, fleeting moments when nervous beginners suddenly transform into confident decorators. Join one of our hands-on cake decorating workshops, where you’ll receive personalised guidance, insider tricks, and best of all, leave with a cake you’re proud to show off. Whether you’re dreaming of pristine fondant wraps or gravity-defying sugar flowers, we’ll help you make it happen.

Spots fill fast! Click here to browse all our upcoming workshops today and let’s create something amazing together. Nanatang is where dreams and passion come to life!

10 Signs Your Baking Class Instructor is Truly Skilled, Knowledgeable and Professional


Whether you’re taking your first steps into the world of measured flour and tempered chocolate or you’re the dedicated baker who elevates every gathering with your creations—the right instructor can transform your experience from daunting to delightful.

At Nanatang, we’ve had the absolute honour of collaborating with truly exceptional baking instructors—the kind who don’t just teach, but inspire. These rare finds (let’s call them the unicorns of the baking world) have a special gift for turning recipes into real confidence at the counter.

So, how do you spot one of these standout instructors? Here are 10 unmistakable signs you’re learning from a true professional—the kind worth their weight in premium butter (and yes, we mean the good European kind).

#1 They explain the “why” behind every step.

A truly knowledgeable baking instructor doesn’t just tell you what to do. They know that explaining why it matters is just as important as showing you how to do it. Instead of simply instructing you to “fold the batter gently”, they’ll describe how overmixing develops too much gluten, leading to a dense, tough cake. When teaching croissants, they’ll break down the science of lamination, describing how cold butter creates those irresistible flaky layers. This depth of understanding transforms baking from a series of steps into an engaging, educational experience. Students under such comprehensive instructors learn the principles behind techniques, making them better, more intuitive bakers!

#2 They adapt to different learning styles.

Every student absorbs information differently, and a skilled instructor recognises this. Some of us are visual learners who need to see every fold and whisk in action. Others need to get their hands in the dough to really get it. A truly great instructor knows this, patiently guiding your shaky hands through that first piping bag squeeze, drawing you quick sketches of how bread rises, or spelling out that tricky technique three different ways until it clicks. That’s the magic—they meet you where you’re at so you walk out actually feeling like you’ve got this, not just pretending to nod along.

#3 They demonstrate impeccable technique.

When you watch a master baker at work, their movements are precise, efficient, and almost effortless. They knead dough with just the right pressure, whip egg whites to perfect peaks, and temper chocolate without a single streak. But what truly makes them a cut above the rest is their ability to break down these techniques in a way that’s easy to replicate. If your instructor can spot the slight overworking of pastry dough before it becomes tough or correct your whisking angle to prevent under-aerated meringues, you know you’re learning from someone with real expertise.

#4 They welcome questions and provide thoughtful answers.

A confident instructor doesn’t shy away from questions. They encourage them! Whether you’re wondering why your cookies spread too much or if you can swap honey for sugar in a recipe, a great teacher will give you a clear, thorough explanation. They don’t dismiss your curiosity with a vague “because that’s how it’s done”. Instead, they take the time to explain the role of each ingredient, the impact of substitutions, and how to troubleshoot common mistakes. Their willingness to dive deep into the “why” without hesitation shows both their knowledge and their dedication to your growth as a baker. 

#5 They stay updated on baking trends and innovations.

The world of baking is always evolving, and a top-tier instructor keeps up with the latest techniques, ingredients and equipment. They might introduce you to the tin tiramisu social media is going wild over, get into the benefits of alternative flours for gluten-free baking, or demonstrate assembling ginormous Korean-styled macarons bursting with inventive fillings. Their knowledge isn’t stuck in the past—they merge classic techniques with contemporary innovations, giving you the best of both worlds.

#6 They emphasise safety and hygiene.

Professionalism in baking includes maintaining a clean, safe workspace. A great instructor emphasises proper food handling, practises safe knife skills, and ensures that workstations stay organised (even when flour is flying everywhere). They’ll remind you why weighing ingredients is more accurate than measuring by volume and stress the importance of avoiding cross-contamination. These habits might not seem glamorous, and can even feel tedious at first, but they’re the foundation of successful, consistent baking.

#7 They share insider tips you won’t find in cookbooks.

Those little “aha!” moments when they share the secret tricks you won’t find in cookbooks? Treat them preciously. Like how double-chilling your cookie dough gives you those perfect thick bakery-style cookies. Or that simple hack of putting a damp towel under your mixing bowl to stop it from dancing across the counter. Or, how just a pinch of citric acid can transform your buttercream from good to incredibly velvety. These golden nuggets come straight from years of flour-dusted experience. When your instructor casually drops one of these gems mid-class, that’s when you know you’re getting the real deal. So listen up and scribble those notes fast!

#8 Their passion for baking is infectious.

The best instructors live and breathe baking. You can hear it in their voice when they describe the perfect crackle of a sourdough loaf or see it in their eyes when they display the delicate art of sugar work. Their enthusiasm is contagious, turning what could be a routine lesson into an exciting adventure. When your teacher is genuinely passionate, it makes you eager to learn, experiment, and push your skills further. And just like the mother dough that kickstarts fermentation, your passion will also soon ignite someone else’s!

#9 They give constructive feedback without discouraging you.

A great instructor knows how to correct mistakes without crushing confidence. If your custard turns grainy, they won’t just say, “That’s wrong”. Instead, they’ll explain that overheating was the likely culprit and show you how to use a double boiler for better control next time. Their feedback is always paired with encouragement and actionable advice, so you leave each class feeling motivated—not defeated.

#10 They celebrate your successes, big and small.

Baking is as much about joy as it is about precision, and the best instructors understand this. When you finally nail that tricky French macaron or pull off your first beautifully braided loaf, they’ll be just as elated as you are. They remember that every baker starts somewhere, and they take genuine pride in your progress. That kind of support doesn’t just teach you skills—it builds your confidence and love for baking.

At Nanatang, we’ve seen how the right teacher can turn a hesitant beginner into a confident baker and a seasoned enthusiast into a true artisan. If your instructor embodies these qualities, you’re in great hands. We know ours do! So if you’re still searching for the perfect class, keep these signs in mind, because learning from a true professional is an experience that stays with you long after the last crumb is gone. 

Join us at Nanatang and let our expert bakers guide you through every whisk, fold and bake—because the best lessons don’t just teach recipes, they spark a lifetime of delicious creativity. Enrol today and start your baking journey with world-class chefs!

8 Versatile Piping Techniques for Fresh Cream Cakes, Cupcakes and More


Ever stared at a beautifully piped cake in a cake fridge and thought, “I could never do that”? You’re not alone! Many budding bakers (once us at Nanatang) struggle with wobbly lines, inconsistent pressure, or designs that just don’t turn out as dreamy as they hoped. But here’s the good news: piping is a skill anyone can master with the right guidance! 

In this guide, we’ll walk you through eight foolproof piping methods for fresh cream cakes, cupcakes, and more, breaking down each step for you to create stunning desserts with confidence. That means whether you’re a complete newbie or just need a refresher, these tips will have you piping like a pro in no time. 

The Classic Swirl

Your Go-To Crowd-Pleaser

Easy, elegant, and found on almost every cupcake—master this, and you’ll never feel stuck again.

The classic swirl is the little black dress of piping: simple, timeless, and always in style. With just a star tip and steady pressure, you can create bakery-worthy cupcakes in seconds.

Real-Life Examples: Perfect for birthday parties or afternoon tea! Pipe a tall, luxurious swirl on vanilla cupcakes, then top with sprinkles or a fresh berry. It’s so effortless, yet it instantly makes your treats look store-bought, and we mean that in the best way.

The Rustic Rosette

Effortlessly Charming

Want a romantic, handcrafted look? This technique is faster than you think.

Rosettes look fancy, but they’re just swirls with a slight twist—literally! Using the same star tip, rotate your wrist as you pipe for a flower-like effect.

Real-Life Examples: Ideal for wedding cupcakes or naked cakes. Try piping a row of rosettes along the edge of a fresh cream cake for a rustic, boho-chic vibe. If one isn’t perfect, trust us, no one will notice—the charm is in the imperfection.

The Simple Shell Border

A Vintage Favourite

This old-school technique is a lifesaver for neat edges and nostalgic charm.

Shell borders were everywhere in grandma’s baking books—and for good reason. They’re quick, forgiving, and add instant polish to any cake. You can’t argue with grandma’s tried-and-true method.

Real-Life Examples: Running low on time? Pipe a delicate shell border around a round cake for a clean finish. It’s also perfect for lining the base of layered cakes, giving them that classic bakery look.

The Ruffle Effect

Dreamy and Rustic

If you love soft, whimsical designs, this one’s for you.

Ruffles make any cake look like it’s dressed in edible lace. All you need is a petal tip and a gentle back-and-forth motion.

Real-Life Examples: Stunning on wedding cakes or Mother’s Day desserts! Try ruffling fresh cream along the sides of a cake for a soft, romantic texture. Pair it with fresh flowers for an extra wow factor.

The Rope Border

Textured and Eye-Catching

This technique looks intricate but is surprisingly simple. For beginners, it can also be great for hiding mistakes.

Twisted rope borders add a cosy, artisanal touch to cakes. A simple zigzag motion with a star tip creates the illusion of braided texture. Finer and smoother tips create a more delicate rope effect, ideal for elegant or smaller cakes. 

Real-Life Examples: Perfect for rustic-themed events, like fairy tea parties and cottagecore-inspired birthday celebrations. Use it on the top or bottom edge of a cake for a homemade-with-love feel. It’s also a clever way to cover up any uneven edges.

The Starburst

Quick and Playful

Need a fun, fast decoration? This one’s a game-changer.

Starbursts are just tiny star squeezes clustered together—but they look like confetti on a cake! Pick a Wilton #18 or #21, and hold the bag straight up. Squeeze to form a small star, stop pressure, then lift to create a peak, and tada! One star is formed. Simply repeat.

Real-Life Examples: Amazing for kids’ birthday cupcakes. Pipe a burst of stars in rainbow colors, or use a single hue for a polka-dot effect. It’s so easy, even little helpers can join in.

The Elegant Drop Flower

Surprisingly Simple

Want floral beauty without the stress? This technique is your shortcut.

Drop flowers look like delicate blooms but take seconds to pipe. Just a small star tip, a squeeze, and a lift—no intricate skills needed!

Real-Life Examples: Stunning on spring-themed desserts. Scatter them over a lemon cake or use them as filler between bigger decorations. They’re also great for covering gaps in your design.

The Modern Wave

Sleek and Trendy

For a contemporary twist, this technique is a must-try.

Smooth, undulating waves give cakes a chic, minimalist look—and they’re easier than they appear.

Real-Life Examples: Perfect for gender reveals or modern celebrations. Pipe soft waves along the side of a cake, then add a single fresh flower for Instagram-worthy elegance.

Mastering Piping One Swirl at a Time

Look how far you’ve come! From shaky first attempts to confidently piping classic swirls, dreamy ruffles, and playful starbursts, you’re now armed with 8 gorgeous techniques to transform any cake or cupcake into a work of art. Remember, even the most stunning desserts start with a single squeeze—so don’t stress over perfection. Every piped star, swirl, and shell is a step towards becoming the baker you’ve always wanted to be.

But why stop here? Imagine creating even more jaw-dropping designs with hands-on guidance, insider tips, and a sprinkle of fun. At Nanatang, we’re all about turning baking dreams into reality—one piping bag at a time. All the great bakers here started exactly where you are now, so be a part of our growing family today! 

Browse our workshops to join in on the learning and fun.

Why Learning from International Chefs Will Level Up Your Baking (And Where to Find Them)


The world is replete with scrumptious food and exquisite desserts. Nations far and wide bring their own culinary delights to the table, presenting what they believe to be the finest representation of their food culture. 

Certainly, there is a vast array of dishes and desserts to discover even within your homeland. However, when you’ve explored all your options or crave something entirely different, venturing beyond borders can unveil flavours, recipes and techniques you never imagined.

One way to do this without splurging on an expensive plane ticket is to learn from acclaimed chefs across continents right from your home base. As walking encyclopaedias of culinary knowledge and expertise, these world-trained chefs can not only widen your worldview, but also challenge your perceptions of taste, tradition and the core nature of the food itself.

This is even more so for dessert, because desserts are the very symbol of celebrations, rituals, and the sweetness of life! Ahead, here’s why learning from international chefs will level up your baking:

#1 It’ll broaden your culinary knowledge.

Different countries have cooking styles and ingredients that are familiar to them. Rather than limiting yourself to what’s physically around you, engaging with other cultures allows you to expand your culinary repertoire—even if their ingredients or techniques don’t seem immediately relevant. Give it time to marinate, and eventually, you may find a way to connect the dots and create something uniquely your own. In fact, that’s how the French-inspired, yet now Korean, fatfat-carons came to be!

#2 You’ll pick up new skills and techniques.

Intrigued by how people assemble the delicate layers of baklava? Or how chefs achieve the perfect temperature every time for choux pastry to puff up without collapsing? There’s no better person to teach you these skills than someone who was born into it. Whether it’s introducing innovative methods or finding a deep-rooted passion to approach the entire craft, a master chef from the heart of the tradition can guide you to newfound dessert perfection.

#3 You’ll discover ingredients you’ve never used before.

Immersing yourself in different cultures opens up a world of unconventional, albeit delectable flavours and ingredients that have the power to completely revolutionise your dishes. In baking, sometimes just a tiny twist can lead to a brand new experience that will leave you craving more. Orh nee and milo dinosaur in macarons—sounds unexpected? Don’t knock it until you’ve tried it!

#4 You’ll connect with the culture behind the cuisine.

A literal taste of history. Plunge into the fascinating stories and cultural significance behind each cookie, cake or pastry to deepen your appreciation of these sweet creations. Most desserts carry captivating tales, whether they are disputable myths or proven historical facts. Take churros, for example: although they’ve long been regarded as a Spanish treat, their origins can be traced back to China, where they were inspired by a fried dough pastry. Understanding the history behind these desserts lends a richness definitely worth savouring.

#5 You’ll push your creativity in the kitchen.

There’s no better way to get inspired than to expose yourself to different techniques and flavours brought forth by like-minded professionals. Part of being a great baker is surrounding yourself with the right people, and these individuals will encourage you to experiment with new recipes. Rather than confining yourself to a specific locale, take this golden opportunity to embrace fusion, which allows you to blend diverse cultural influences—stretching your creative range and introducing exciting new ingredients and methods into your culinary portfolio!

#6 You’ll expand your career horizons.

Networking with international chefs is a marvelous way to open up opportunities for global culinary experiences and jobs, both at home and abroad. You never know, the chef you met five years ago at that baking workshop might be the one to reach out when it’s time for you to try something new, offering you a chance to work with them in another country. 

#7 You’ll develop a sharper palate.

A big part of training your sensitivity to the nuances of flavour, texture and aroma in food is simply getting hands-on experience—actually trying things out for yourself. Tasting desserts from different cultures expands your food vocabulary, helping you identify each element and create mind-blowing flavour profiles. Developing a refined sense of taste takes experience, practice and exposure—and international chefs serve as a catalyst to that. Why else do so many chefs and bakers travel the world?

#8 You’ll grow to become more adaptable in the kitchen.

The kitchen can feel like a fixed setting, but there are always changing circumstances that could completely throw off your creations. The key to handling this uncertainty is learning how to stay in control no matter what, and learning from international chefs is the quickest way to get there. From diverse cooking environments to surprising techniques and unique problem-solving methods, you’ll discover your own versatility and adaptability as a chef. Like, how do you fix a sunken soufflé? Only a French baker, or one who has been trained in French patisserie, could tell you how to.

#9 You’ll gain a deeper respect for food traditions.

As mentioned before, every dish has a story, and that’s where traditions are born. Connecting with these stories helps you appreciate the food on a deeper level when you finally experience it, even if you’re not the one making it. When you develop a personal connection to these dishes, you become more thoughtful and intentional in your cooking. And when you start unpacking the flavours yourself, you’ll discover even more depth. Chefs are like walking manuals on how to truly enjoy food, and it’s only with knowledge that we can savour every bite with purpose and appreciation.

#10 You’ll get to meet new people from all over the world.

Last but not least, one of the coolest parts of learning from international chefs is the chance to meet so many interesting people. Chefs from all over the world bring their own flavour to the kitchen, and getting to know them can teach you more than just recipes. You’ll hear stories, share tips, and maybe even make some lasting friendships. It’s a chance to grow your network while learning something new and exciting.

Learn from World-Class Chefs in Singapore at Nanatang 

Starting out as an online bakery in 2013, Nanatang has since grown into a vibrant studio and bakehouse. Today, we offer workshops for aspiring bakers, featuring world-class chefs from all over the globe. From French and Korean to Italian and Japanese, you’ll get hands-on experience with the best. At Nanatang, dive headfirst into patisserie knowledge, pick up baking tips fermented over years of experience, and join a supportive community that has your back—wherever you are! 

Learn from international chefs right here in Singapore and take your baking to the next level, because adventure in the kitchen is just a recipe away. Browse all the upcoming workshops at Nanatang now and make your passion thrive worldwide.

Everything to Know About Fresh Cream vs. Buttercream


Cream is, well, la crème de la crème. We’re in love with the way it’s carefully squeezed from long piping bags, travelling through finely shaped nozzles, and ending up as delicate, ruffled stars on cakes, cookies and pastries. But not all creams that exit a piping bag are the same. In fact, when it comes to cakes, there are two main types of cream commonly used: buttercream and fresh cream, also known as fresh whipped cream (or simply whipped cream).

This article explains the differences between fresh cream and buttercream, and which are used when.

Fresh Cream

In fresh cream cakes, fresh cream often refers to whipped heavy cream, which is a dairy cream that contains a high fat content. Aerated by whisking, fresh cream is light and fluffy, making it ideal for dessert toppings and fillings. A popular dessert known for using fresh cream is the Japanese strawberry shortcake.

Ingredients and Preparation 

Fresh cream requires three basic ingredients: cold heavy cream, sugar (powdered or granulated), and vanilla extract (optional). Preparation involves using a handheld or stand mixer fitted with a whisk attachment to whip on high speed until medium peaks form.

Taste and Texture 

Heavy cream tastes sweet and light, especially if it is enhanced with vanilla. When whipped well, it is also airy and fluffy, while having a smooth and creamy texture. Sweetening fresh cream with sugar makes it delicious for desserts. Some may also describe it as rich and fatty, with a distinct dairy flavour.

Applications 

Fresh cream is commonly used for delicate and less overpowering cakes due to its relatively mild and neutral taste. This means that when paired with fruits, such as in a fruit cake, or a lighter option, like a Victoria sponge cake, its luxurious and creamy flavour can properly come through.

Buttercream

Buttercream is a butter-based frosting that some may also refer to as butter icing. Like fresh cream, it is used for filling and decorating cakes, although it exists in more colours and even flavours compared to fresh cream. While not as popular, buttercream is appreciated for its ability to hold its shape well, and can also be stored at room temperature for longer.

Ingredients and Preparation 

The recipe for buttercream icing typically calls for unsalted butter (softened), powdered sugar, milk and vanilla extract. The addition of eggs creates a lighter, fluffier texture—a trusted method for helping Swiss, Italian and French buttercreams hold their shape better. Sometimes, a dash of salt may be included to balance the sweetness. Generally, buttercream is made by combining the ingredients and beating them on low speed until it reaches medium consistency. You can test its readiness by running your spatula through the buttercream; if it comes out with small and soft peaks (which makes it highly spreadable), you’ve gotten the right consistency. 

Flavoured buttercreams will involve the addition of other ingredients, such as extracts and essences. Chocolate flavoured buttercream uses cocoa powder or melted chocolate for a deep chocolate taste. 

Taste and Texture 

Buttercream is less delicate than fresh cream. However, it is also rich and much more decadent—deliciously buttery. Texture-wise, it is dense and smooth, making it heavier than whipped cream. Among the different types of buttercream, American buttercream is the heaviest and sweetest, while Swiss meringue buttercream is considered one of the lightest, and silkiest. In Singapore, the old-fashioned buttercream cakes are often made of American buttercream, which gives them the rich, slightly oily and nostalgic taste of traditional bakery cakes. 

Italian buttercream is considerably smooth, stable, and slightly less sugary than American buttercream. The meringue imparts a mild sweetness that complements the buttery taste, and its creamy consistency makes it rather popular for cake decorating. On the other hand, French buttercream is known for being the most “custard-like” of all. It is made with egg yolks instead of whites, and presents a balanced flavour profile—making it a superb frosting choice for individuals who love a rich, velvety and buttery indulgence with just a hint of custard-like depth.

Applications 

Buttercream has woven itself into various desserts by virtue of how insanely versatile it is in terms of flavour, appearance and stability (the ability to maintain its shape and structure). From coating and decorating cakes to filling pastries and Swiss rolls, buttercream is still widely acknowledged by bakers, even as its popularity falters in favour of lighter alternatives like fresh cream. Cupcakes continue to be one of the most recognisable pastries that still showcase buttercream.

How to Choose Between Fresh Cream and Buttercream

You should be choosing between fresh cream and buttercream based on the dessert you’re making. Here are five thoughtful questions to ask yourself to guide you to the right choice. 

Final Thoughts

After all this explanation, we hope this blog has given you a clearer understanding of the qualities of fresh cream and buttercream. However, as bakers ourselves, we know that nothing teaches better than hands-on experience. That’s why at Nanatang, we’re super excited to offer you a space where you can experiment and learn from skilled chefs using only the finest ingredients—ensuring that all the imaginable variables are under control.

Join us in one of our workshops and take your baking skills to the next level. Whether you’re new to the art or looking to refine your technique, we’ve got everything you need to create delicious masterpieces. Explore our workshops now, or browse our cakes and desserts today—whether fresh or buttercream has already won your heart!

Ways to Create Desserts Without Turning On the Oven


Baking is an art, but it doesn’t always require an oven. Whether you’re avoiding the heat, short on time, or simply looking for a creative way to make desserts, no-bake recipes offer a world of possibilities. From creamy cheesecakes to indulgent chocolate treats, these desserts deliver all the flavour without the hassle of baking.

At Nanatang, Singapore’s renowned artisan bakery and baking studio, we believe in bringing people together through creative and delicious desserts. While our expertise spans a variety of baked goods, we also offer hands-on workshops that teach techniques perfect for no-bake treats.

Why Make No-Bake Desserts?

No-bake desserts are becoming increasingly popular, and for good reason. They are:

If you’re ready to explore the world of no-bake desserts, here are some of the best ways to create delicious treats without turning on the oven.

1. Master the Art of No-Bake Cheesecakes

Cheesecake is a classic dessert that doesn’t have to be baked to be delicious. No-bake cheesecakes offer the same creamy texture and rich flavours but are set in the refrigerator instead of the oven.

How to Perfect a No-Bake Cheesecake

Learn from the Experts

While Nanatang specialises in various baking techniques, their workshops cover fundamental skills that can be applied to making no-bake cheesecakes. Understanding how to balance flavours and textures will help you create a cheesecake that looks and tastes professional.

2. Create Elegant Tiramisu and Other Layered Desserts

Tiramisu is a world-renowned Italian dessert that requires no baking. Its signature layers of coffee-soaked biscuits and creamy mascarpone filling make it a luxurious treat.

Why Layered Desserts Work Well as No-Bake Options

Nanatang’s Tiramisu Workshop

Nanatang offers a hands-on class called Social Media’s Favourite Tin Tiramisu, in which participants learn to make a no-bake tiramisu in a trendy tin presentation. This workshop covers essential layering techniques, helping you achieve a rich and creamy texture without turning on the oven. Whether you’re a beginner or an experienced baker, this class provides valuable insights into creating professional-quality tiramisu at home.

3. Make Decadent No-Bake Chocolate Treats

Chocolate lovers don’t have to rely on an oven to indulge in their favourite flavours. From silky mousse to decadent truffles, there are plenty of ways to enjoy no-bake chocolate desserts.

Popular No-Bake Chocolate Treats

How to Elevate No-Bake Chocolate Desserts

4. Decorate Cakes Without Baking

If you love creating stunning cakes but don’t want to bake from scratch, decorating pre-made cakes is a fantastic alternative. Whether you use store-bought sponge cakes or pre-baked layers, decorating can transform them into showstopping centrepieces.

Cake Decorating Techniques for No-Bake Cakes

Learn Cake Decorating at Nanatang

Nanatang’s cake decorating workshops provide hands-on experience in creating professional-level cakes. These classes suit beginners and experienced bakers and offer insights into advanced decorating techniques.

5. Explore Quick and Creative No-Bake Desserts

No-bake desserts aren’t limited to cheesecakes and mousse. Countless easy-to-make treats require minimal effort but still deliver big flavour.

Simple No-Bake Dessert Ideas

How to Make No-Bake Desserts More Exciting

Final Thoughts

No-bake desserts open up endless possibilities for creative and delicious sweet treats. Whether crafting a silky cheesecake, layering tiramisu, or decorating a pre-made cake, there’s no need for an oven to create something spectacular.

At Nanatang, we offer workshops that provide hands-on experience in dessert-making, helping you refine your skills and explore new techniques. Whether you’re a beginner or a seasoned baker, there’s always something new to learn.

Visit Nanatang’s Workshop page to explore our classes and start your no-bake dessert journey today.

6 Chunky Facts About Fatfat-Carons That Make Them So Special


Macarons have long been known for their delicate, dainty nature, but Fatfat-Carons flip that idea on its head. These oversized, indulgent creations are a bold evolution of the classic French macaron, featuring thicker shells, ultra-creamy fillings, and creative flavours that push traditional pastry-making’s boundaries.

If you haven’t tried them yet, here’s everything you need to know about these chunky, flavour-packed desserts and why they’ve taken Singapore by storm.

1. Nanatang is the Original Creator of Fatfat-Carons in Singapore

Unlike regular macarons, prized for their petite elegance, Fatfat-Carons are unapologetically oversized and indulgent. Nanatang, Singapore’s leading bakehouse and baking studio, exclusively crafted these unique treats.

Nanatang introduced Fatfat-Carons as Singapore’s first Korean-style oversized macarons, drawing inspiration from the popular ttung-carons in Korea. While the concept started with a trend, Nanatang perfected the recipe, making these chunky macarons a signature product that has won the hearts of dessert lovers.

In addition to selling them, Nanatang is the only baking studio in Singapore offering Fatfat-Caron workshops, where aspiring bakers can learn to create these decadent treats from scratch.

2. They’re Bigger, Bolder, and Chunkier Than Regular Macarons

A typical macaron is a bite-sized delicacy, but fat macarons are an entirely different experience. They are nearly twice the size of traditional macarons, with extra-thick shells and generous fillings that add layers of texture and flavour.

While classic macarons have a thin layer of buttercream or ganache, Fatfat-Carons have thick, creamy centres and often incorporate chunks of fruit, chocolate, or even savoury elements for a completely new take on the dessert.

The result? A chewier, creamier, and more satisfying macaron that feels like a whole dessert rather than a quick bite.

3. The Flavours Are Next-Level (and Incredibly Creative!)

One of the biggest reasons Fatfat-Carons stands out is its bold and unexpected flavours. Nanatang is inspired by local desserts, nostalgic childhood snacks, and modern pastry trends, resulting in unique flavour combinations.

Here are some of the most popular Fatfat-Caron flavours at Nanatang:

Nanatang frequently experiments with new flavours, keeping the lineup exciting and constantly evolving.

4. They Require Special Baking Techniques to Get Just Right

Macarons are already known for being notoriously tricky to make, but Fatfat-Carons take that challenge to another level. Their larger size and heavier fillings require special techniques to ensure the shells remain light, airy and structurally stable.

At Nanatang’s Fatfat-Caron workshops, expert pastry chefs guide participants through the intricate process of making these oversized macarons, covering techniques like:

For those who want to level up their macaron skills, learning to make Fatfat-Carons is a fun and rewarding challenge.

5. They’re More Than Just Macarons—They’re Flavour Bombs!

While traditional macarons are known for their delicate balance of sweetness and texture, Fatfat-Carons are designed to be indulgent and intense. Their higher filling-to-shell ratio means each bite is packed with flavour, making them feel more like a hybrid of a macaron, cake and trifle than just a pastry.

The thicker shells enhance the experience, offering a chewier, more substantial bite than regular macarons. Because the fillings are so dense and rich, every Fatfat-Caron feels more like a mini dessert than a light treat.

Whether you’re a fan of bold, creamy flavours or complex textural contrasts, Fatfat-Carons are designed to deliver maximum satisfaction in every bite.

6. Where to Get Fatfat-Carons: Buy or Bake?

Fatfat-Carons are available exclusively at Nanatang, where customers can purchase freshly made batches with rotating flavours. New and seasonal flavours are introduced regularly, ensuring that each order from Nanatang brings something exciting and different.

For those who want to go beyond eating them, Nanatang also offers exclusive Fatfat-Caron workshops. Participants learn how to bake, fill and decorate these oversized macarons from scratch in these classes. They are designed for all skill levels, making them an excellent experience for beginners and experienced bakers.

FAQs About Fatfat-Carons

Are Fatfat-Carons harder to make than regular macarons?

Yes, due to their size and extra filling, they require precise techniques and a stable structure, which is why Nanatang’s workshops are great for learning the process.

Can I order customised Fatfat-Carons for special occasions?

Absolutely. Nanatang offers custom orders for birthdays, weddings and corporate events.

How long do Fatfat-Carons last?

They can last two to three days in the fridge but are best enjoyed fresh.

Why Fatfat-Carons Are Worth the Hype

Fatfat-Carons are more than just an oversized macaron—they represent a new, innovative way to experience this classic dessert. Their chunky build, creative flavours, and rich textures make them a must-try for any dessert lover looking for something exciting and indulgent.

Beyond their deliciousness, Fatfat-Carons showcase the art and creativity of modern baking, blending traditional French techniques with bold, Asian-inspired flavours. Whether you buy them fresh from our bakehouse or join a workshop to make your own, one thing is clear: these oversized macarons are changing how we think about desserts!

If you’re ready to experience Singapore’s unique macarons, visit Nanatang today to order or sign up for a class.

10 Reasons You’ll Love Being in a Baking Class


You’ve probably followed recipes for butter cookies, brownies, and banana bread online before, and had decent success with them. They’ve achieved the hallmarks of passable bakes—a lovely fragrance wafts in the air, and the treats turned out tasty enough to enjoy. But learning to bake from scratch and sourcing your recipes from others is as much about the end result as it is about the process. Baking classes, like those offered at Nanatang, can enrich your time both in and out of the kitchen, making your experience feel more rewarding than just blindly following a recipe. 

Need a little push? Here are 10 reasons to help convince that you’ll love joining a baking class, no matter your skill level!

#1 You can pick up basic baking skills.

One of the things missing from simply following instructions without much thought is the opportunity to understand the “why” behind each step—like the distinct differences between stirring and folding. Enrolling in a structured baking programme ensures you’re taught the fundamentals, including essential techniques for measuring and mixing ingredients, temperature control, and the trick to balancing flavours and textures. 

#2 You’ll get to explore different cultures through desserts.

Baking classes are where the worlds of foodies and history buffs collide. From cheesecakes with origins in Greece and wagashi influenced by Buddhist traditions, to the chunky macarons that recently gained fame in Korea, there are international recipes and techniques waiting to be uncovered. And contrary to popular belief, croissants might not even have originated in France. Intrigued?

#3 You get to work with professional tools and people.

Getting to work with professional bakers is incredibly valuable, because it offers hands-on experience with experts who are recognised for their craft. This means you will have access to techniques and insights that you otherwise wouldn’t have known from other sources. You’ll also get to experiment with tools and equipment like stand-in mixers and piping bags under qualified supervision.

#4 You can handcraft gifts for family and friends.

Nothing speaks thoughtfulness and care like handmade gifts. We believe that a way to any person’s heart is through their stomach. Whether it’s a special occasion or any other day, knowing how to bake is like having the right gift ready at all times.

#5 You’ll learn the science behind baking.

Baking is a delicate balancing act between art and science. While culinary schools explore this in depth, baking workshops provide a fantastic introduction, allowing you to dabble with the basics—even if you’re just baking for fun. For example, different ingredients interact in unique ways, like how butter and sugar work together to create tender, fluffy crumb.

#6 You relieve stress—and inspire creativity.

Baking is an activity that requires a significant level of focus and attention. Not only does concentrating on your creation help you stay in the present moment, it also empowers you to feel a sense of control and purpose. Its therapeutic benefits can alleviate stress and restore creativity.

#7 You’ll be ready to kickstart a career in baking.

With expert guidance, the distant dream of becoming a baker becomes much more attainable. Even if working as a full-time baker isn’t your goal, you can still turn your passion into a side hustle or even open your own bakery. A choice like this has the potential to reshape your career path!

#8 You’ll discover healthier alternatives along the way.

While the internet is certainly a treasure trove of inclusive and healthy alternatives, baking classes offer a more personalised approach to ingredient swapping. With the accumulated knowledge and experience of professional bakers, you’ll learn which substitutes work best and get real-time help if a recipe doesn’t turn out as expected. For the health-conscious foodie who wants to craft the perfect guilt-free indulgence, baking classes are the way to go!

#9 You’ll save money on sweet treats!

Those containers of cookies and boxes of pastries during birthdays, anniversaries, and special occasions stack up to a lot. By mastering the art of baking, you can create professional-quality baked goods at home for a fraction of the price.

#10 You’ll connect with fellow baking enthusiasts.

Last but not least, baking workshops and courses are a great way to meet like-minded people who share your love for creating—and enjoying—delicious treats. You’ll connect with others who can inspire you, share ideas, and help you grow your skills. These aren’t just networking opportunities—they’re friendships and collaborations that can keep you motivated and excited about baking, whether you’re looking to turn it into a career or just want to try something fresh and fun.

Final Thoughts

Ready to roll up your sleeves and put on your oven mitts? Learning from professional bakers in a detailed baking programme like those at Nanatang offers countless opportunities for self-care and improvement. You get to have fun, learn some cool tricks from the pros, and further reinforce the belief that whipping up something without shortcuts is way more satisfying (and delicious). Don’t wait—our world-class courses are high in demand! 

Browse and enroll now to experience the magic for yourself.